Tutorial: Connect Teachable webhooks and API to automate course enrollment sequences
Introduction
The following tutorial guides you through how to connect Teachable webhooks and the API in order to automate course enrollment sequences. For example, you might have multiple courses in your school that you want your students to take in a particular order—and you only want them enrolled in Course B after they complete Course A.
This is an advanced tutorial—in order to accomplish the end result, we need to use webhooks to create an “on-demand” monitor that triggers the Teachable API request to run each time a webhook payload is received. Additionally, we need to pull data from the received webhook and automatically include it in the request to the API. (Don’t worry if you’re already overwhelmed…we’ll walk through it step-by-step!)
Typically, one might achieve the above using Zapier—a third-party service that automates these kinds of triggers and actions. While Zapier is great, it can get expensive pretty quickly. By using the guide below, you can achieve the same result at a much lower cost. We use an API platform called Postman for the purposes of this tutorial, which includes up to 1,000 calls on their free plan, and up to 10,000 calls at $12/month.
You can also get creative and use the general structure provided in this tutorial to connect any webhook to any API endpoint. Ultimately, the goal is to help you automate triggers and actions in whatever way works best for your business.
What you need
We use a few specific programs in this tutorial, including:
- A Teachable account on the Growth plan or higher, and a Teachable API key
- Postman – what we’ll be using for this tutorial as an API platform. (If you don’t already have an account, you can start with a free account, and download the application to your computer.)
- A Slack account (the free plan works just fine!)
Tutorial
First, we need to set up a Slack webhook. Slack is going to play an important role in receiving data from our Teachable webhook. You could theoretically use another application here, but we find that Slack is a) easy to use, b) a great way to monitor incoming webhooks, and c) free.
To set up the Slack webhook:
- If you don’t already have a Slack workspace, create one from their website and download the Slack app for your computer.
- Next, we need to build an app in Slack. Navigate to https://api.slack.com/apps and click Create an App. In the popup window, select to make an app From scratch.
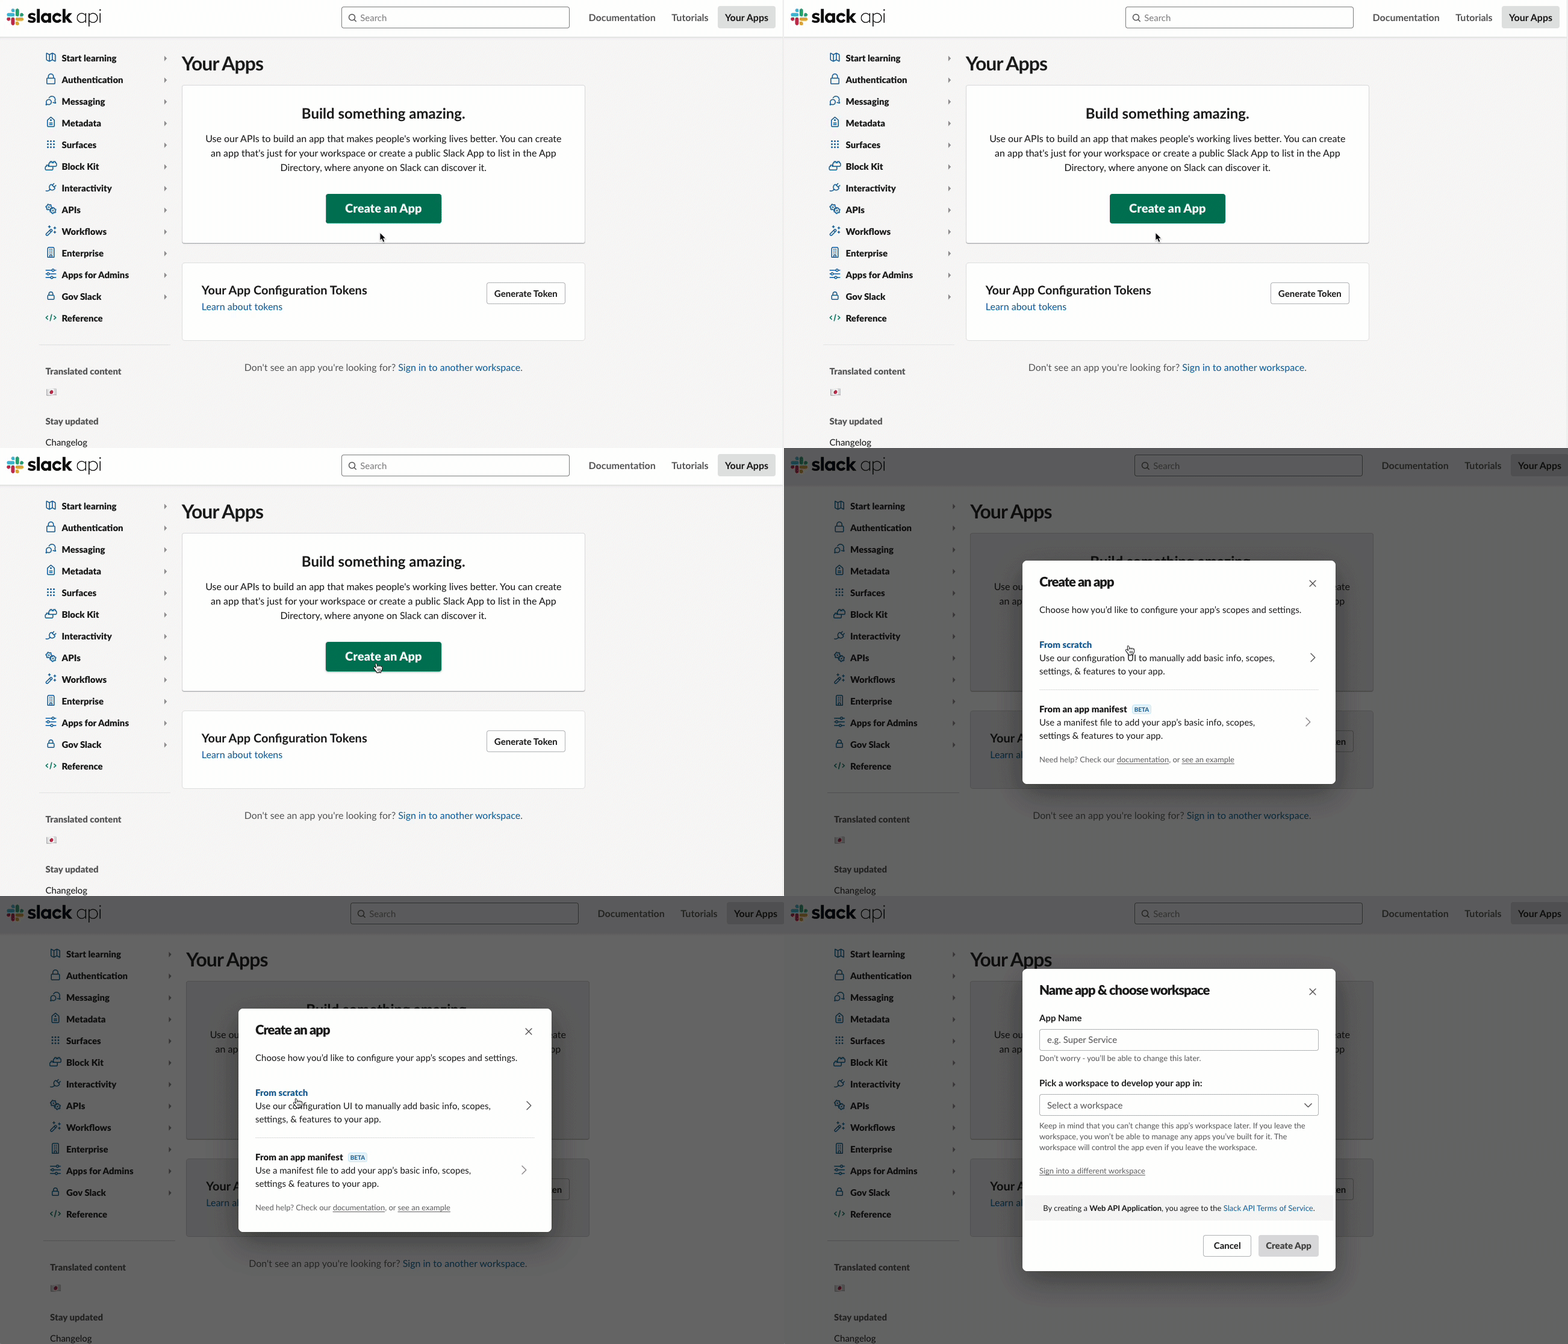
- In the popup window fields, enter in an App Name (we’ll use “Course Enrollment Completed” in this example). You also need to pick a workspace to create your app in. Once you’ve selected, click Create App.
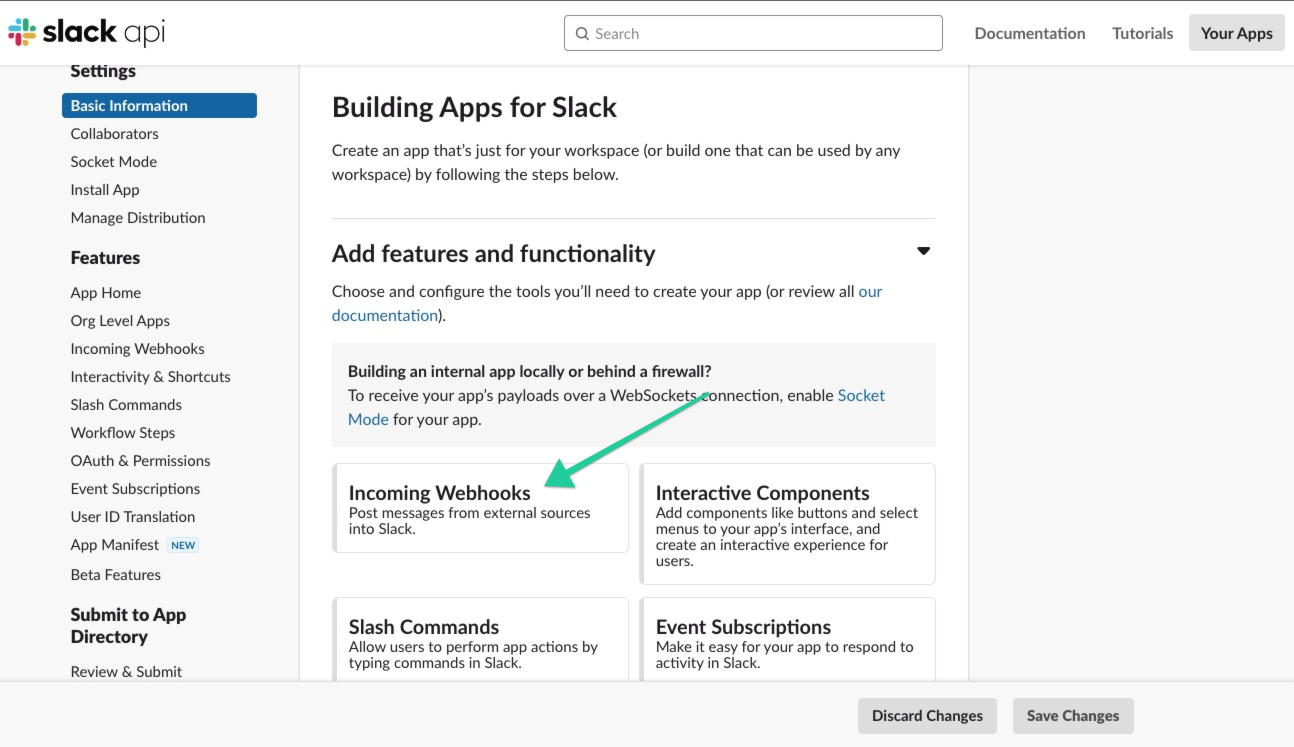
- On the following page, navigate to the Add features and functionality section and select Incoming Webhooks.
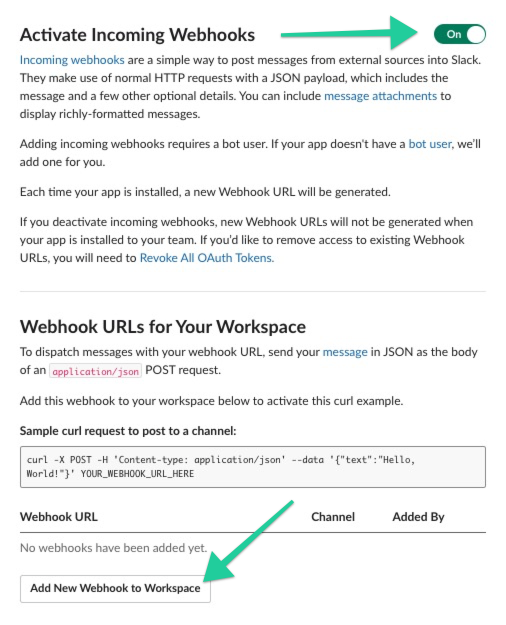
- Turn on the Activate Incoming Webhooks toggle, then click the Add New Webhook to Workspace button.
- On the following page, select which channel of your Slack workspace you want the incoming webhooks to be posted to. A message will be posted in the channel each time a webhook is received (i.e., each time a student completes a course in your school), so choose wisely! Once you’ve selected a channel, click Allow.
- You should see a webhook URL available to copy. Save this URL—we’ll need it in the next section.
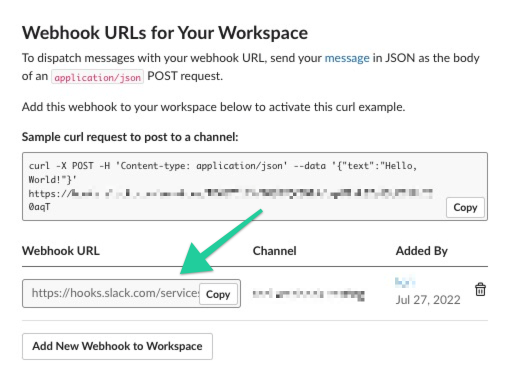
Now, let’s test that our Slack app works by sending a POST request to the Slack webhook. We’ll also get our basic setup in Postman sorted.
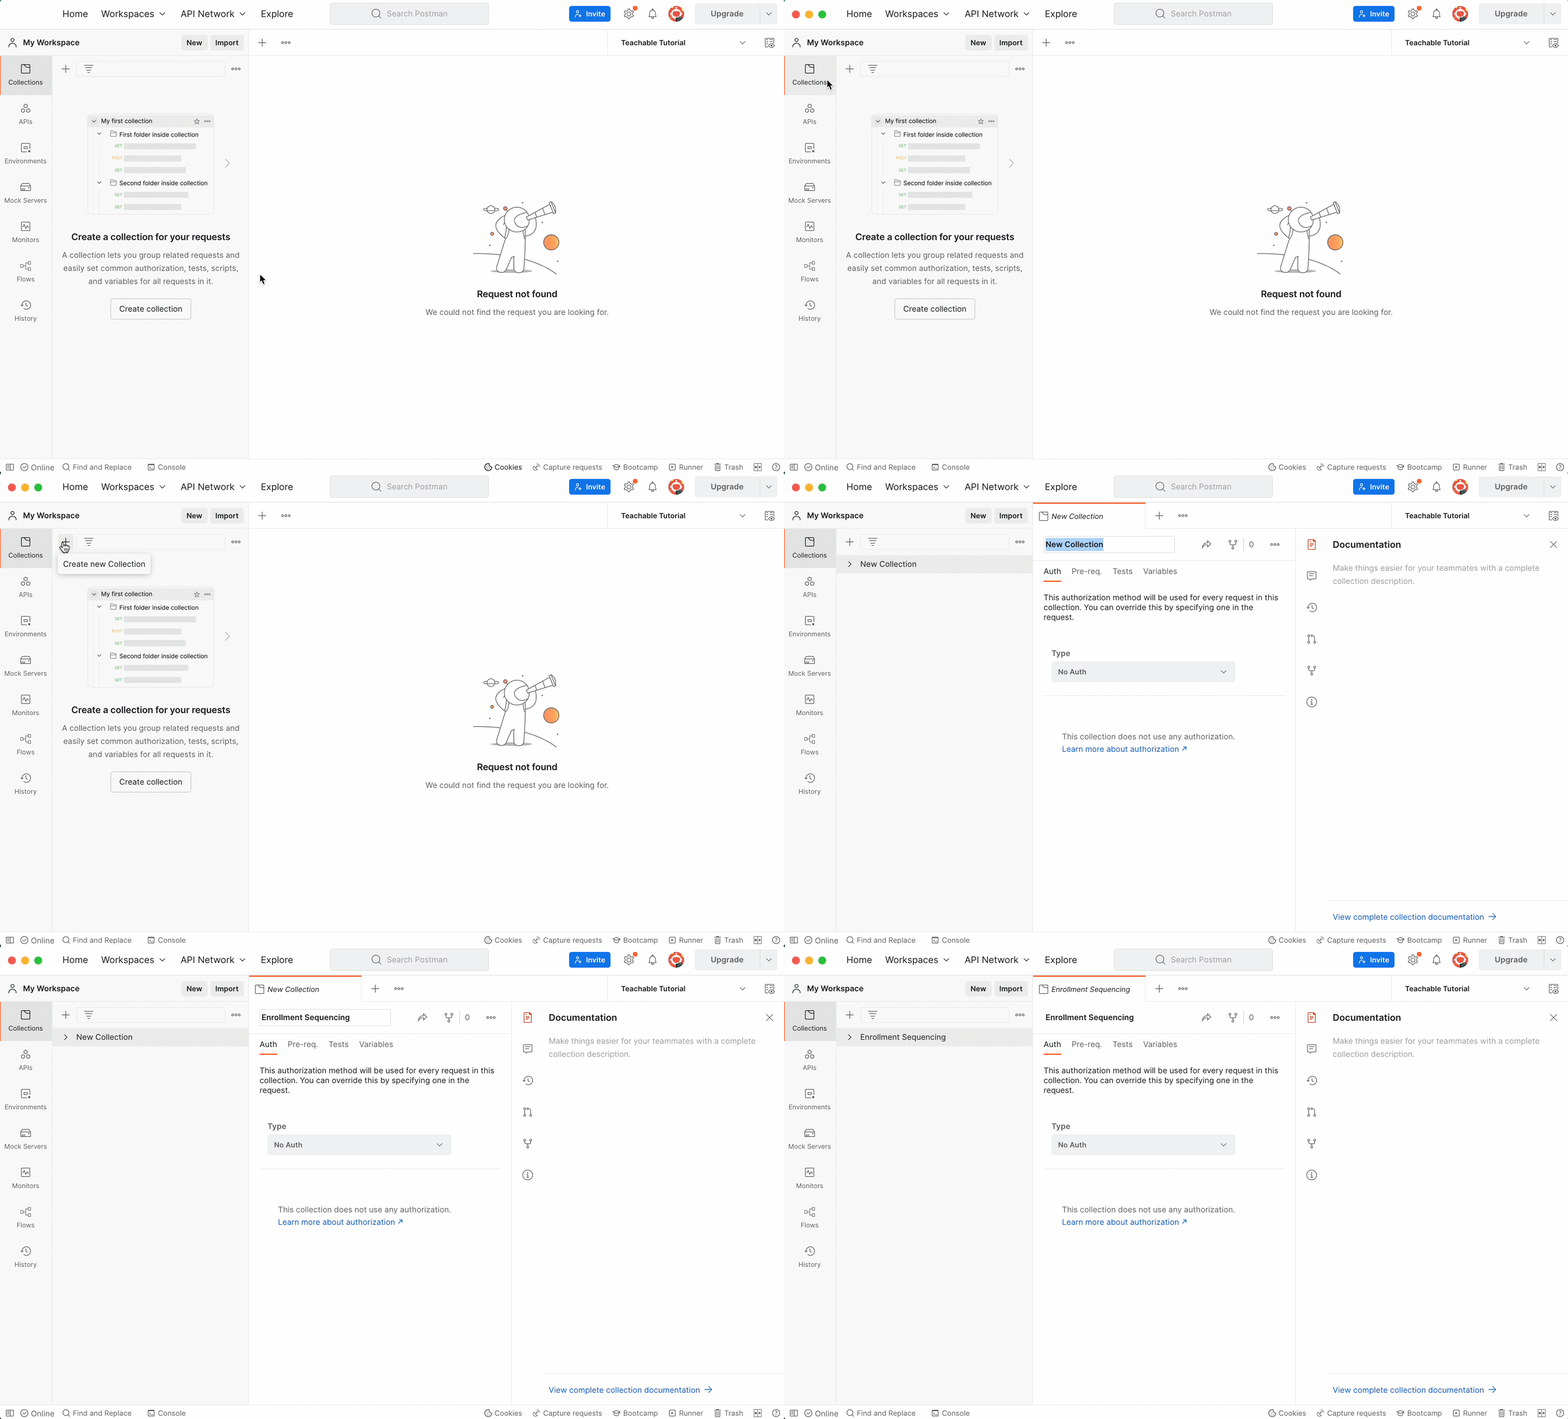
- Open up the Postman application, and create a new collection. You can give your collection a name—for this example, we’ll call the collection “Enrollment sequencing”. (Learn more about collections in Postman.)
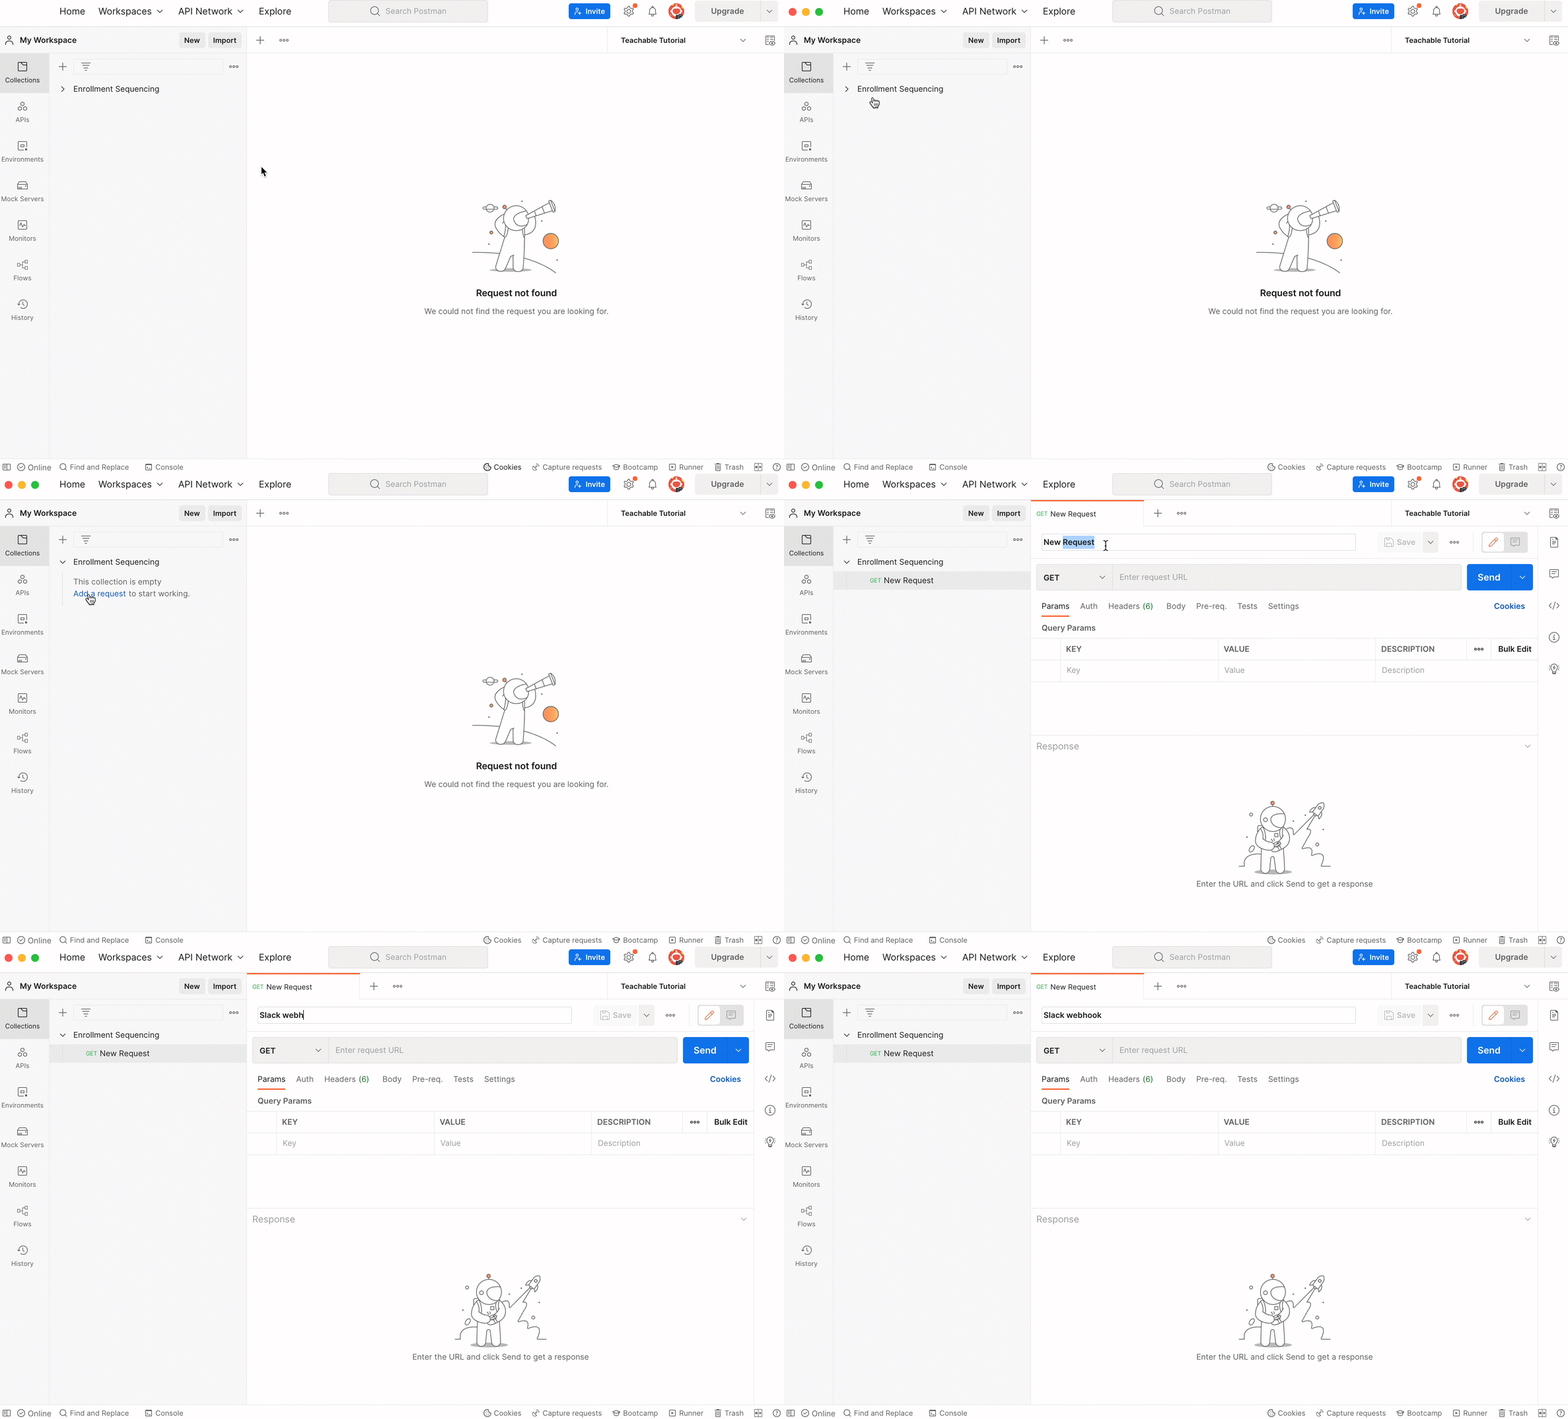
- Add a new request to the collection you created in the step above. We’ll title this request “Slack webhook.” (Learn more about creating and building requests in Postman).
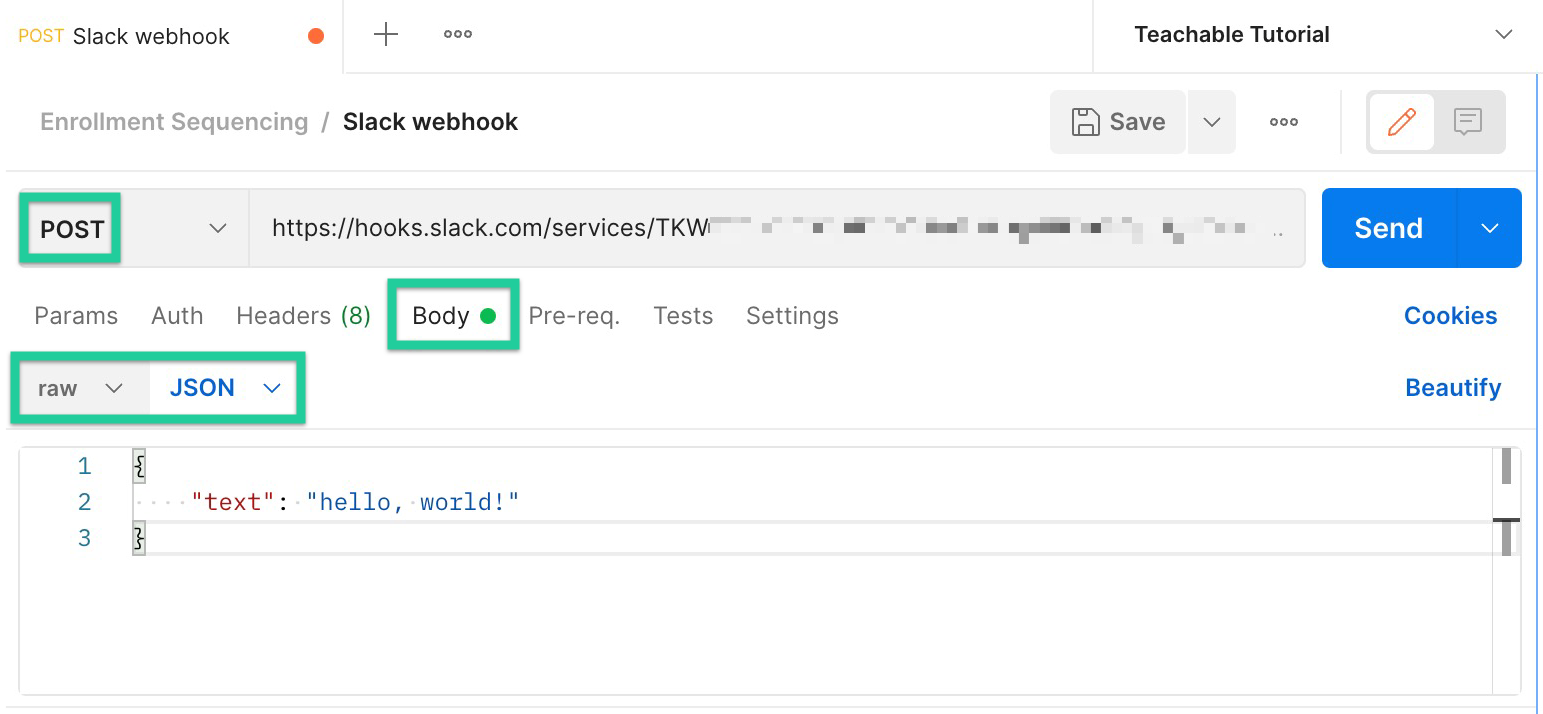
- Build the Slack webhook request as a POST request. For the request URL, copy and paste the Slack webhook URL you receive in step 7 of the section above. In the Body tab of the request, select the raw data type option from the dropdown menu, and then select JSON as the input type. Finally, paste the below JSON data in the body window:
{
    "text": "hello, world!"
}
- Be sure to Save your changes, then click Send to test the webhook. If everything worked correctly, you should receive a message that looks like the following in the Slack channel you created the app in:

Next, we’re actually going to create a new webhook using Postman’s API. This webhook is going to function as our “on-demand” monitor, which will trigger our enrollment sequencing collection each time a webhook is sent.
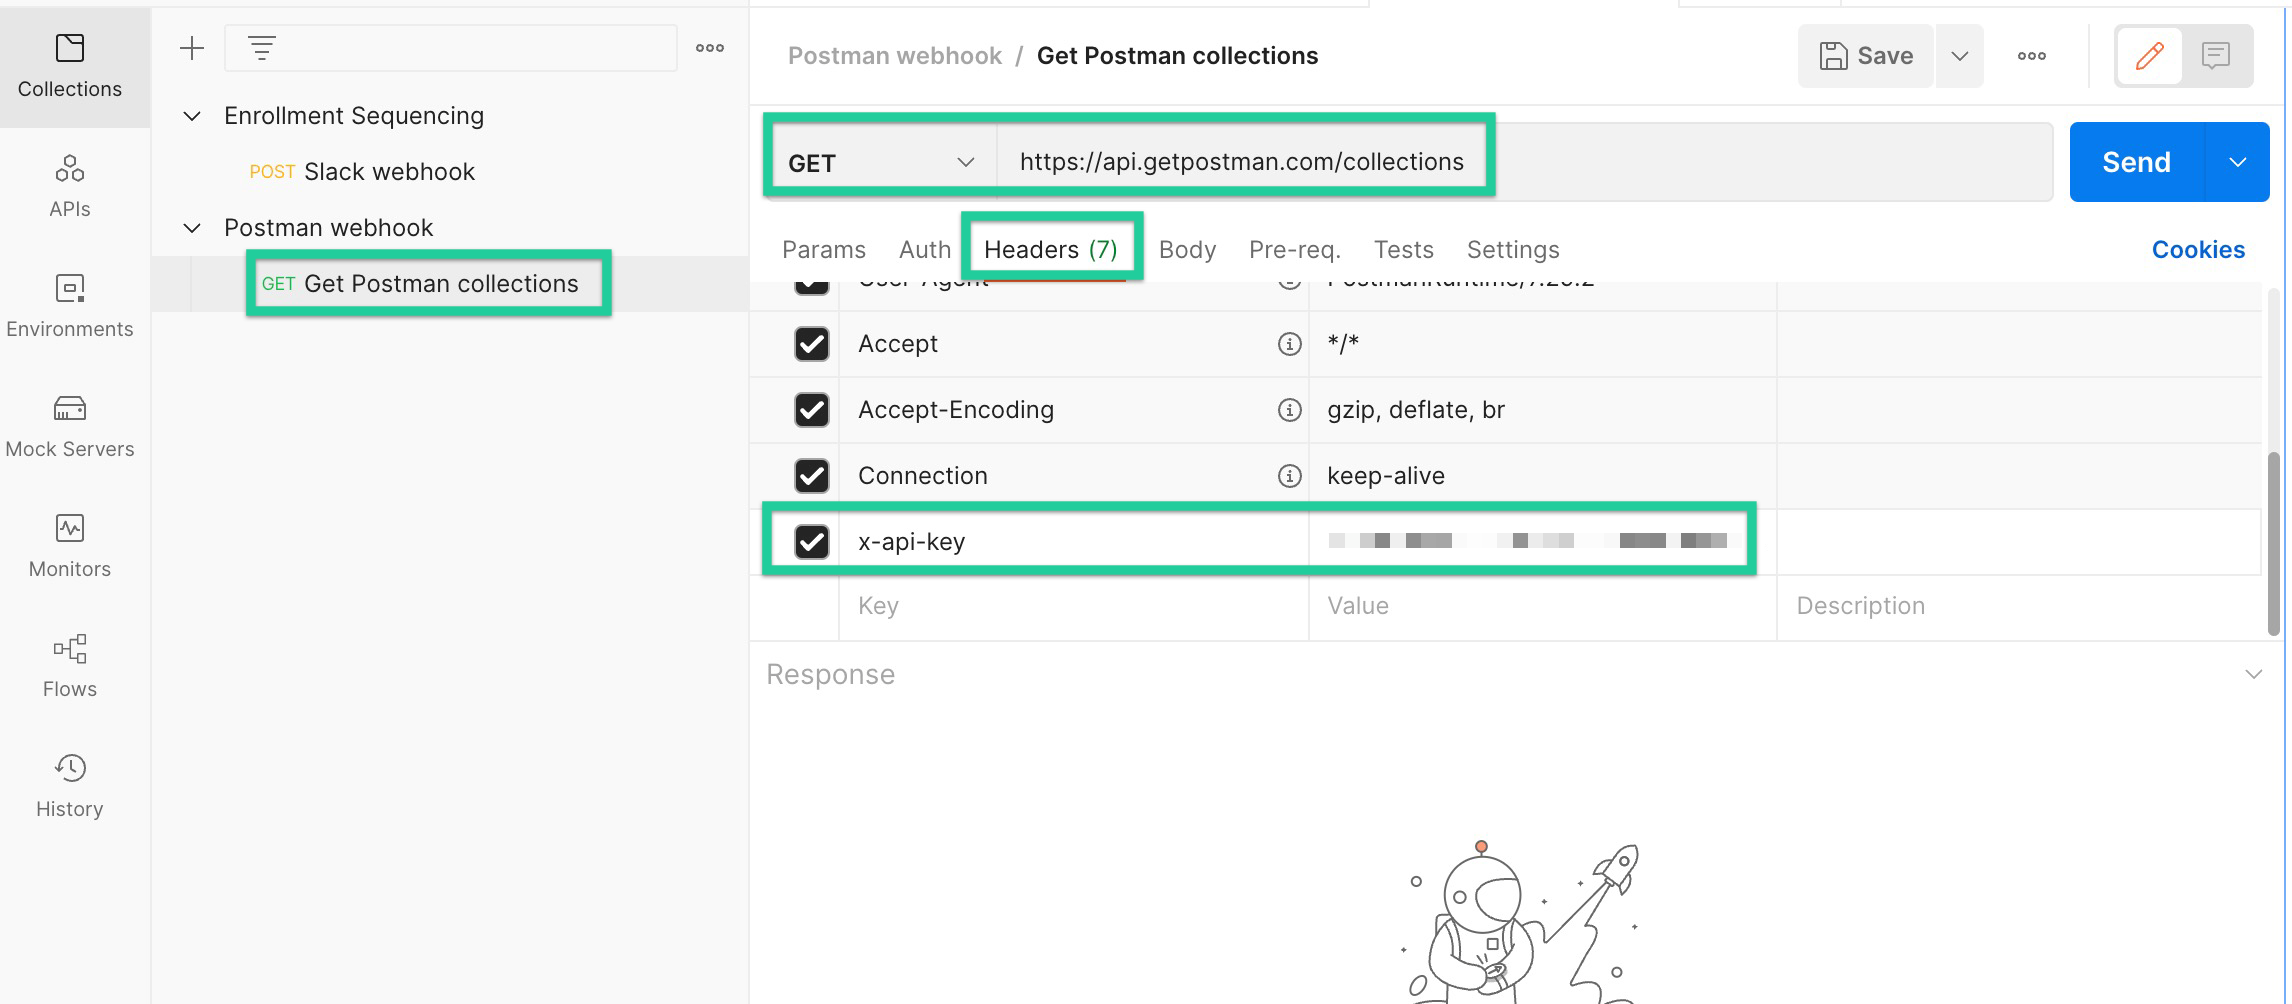
- Go back to your Postman application, and create a new GET request to
https://api.getpostman.com/collections. (We chose to put this request in a new collection titled “Postman webhook.” - Before we can make the request, we need to create a Postman API key via your Postman Integrations Dashboard. (Learn more about Postman API keys.) Once you have your Postman API key, add it to the Header of the request as the value for
x-api-key:
- Be sure to Save your changes, then click Send to make the request. In the return body, search for the original collection you put your Slack webhook request in (ours is titled “Enrollment Sequencing,”) and copy the
uidnumber of that collection.
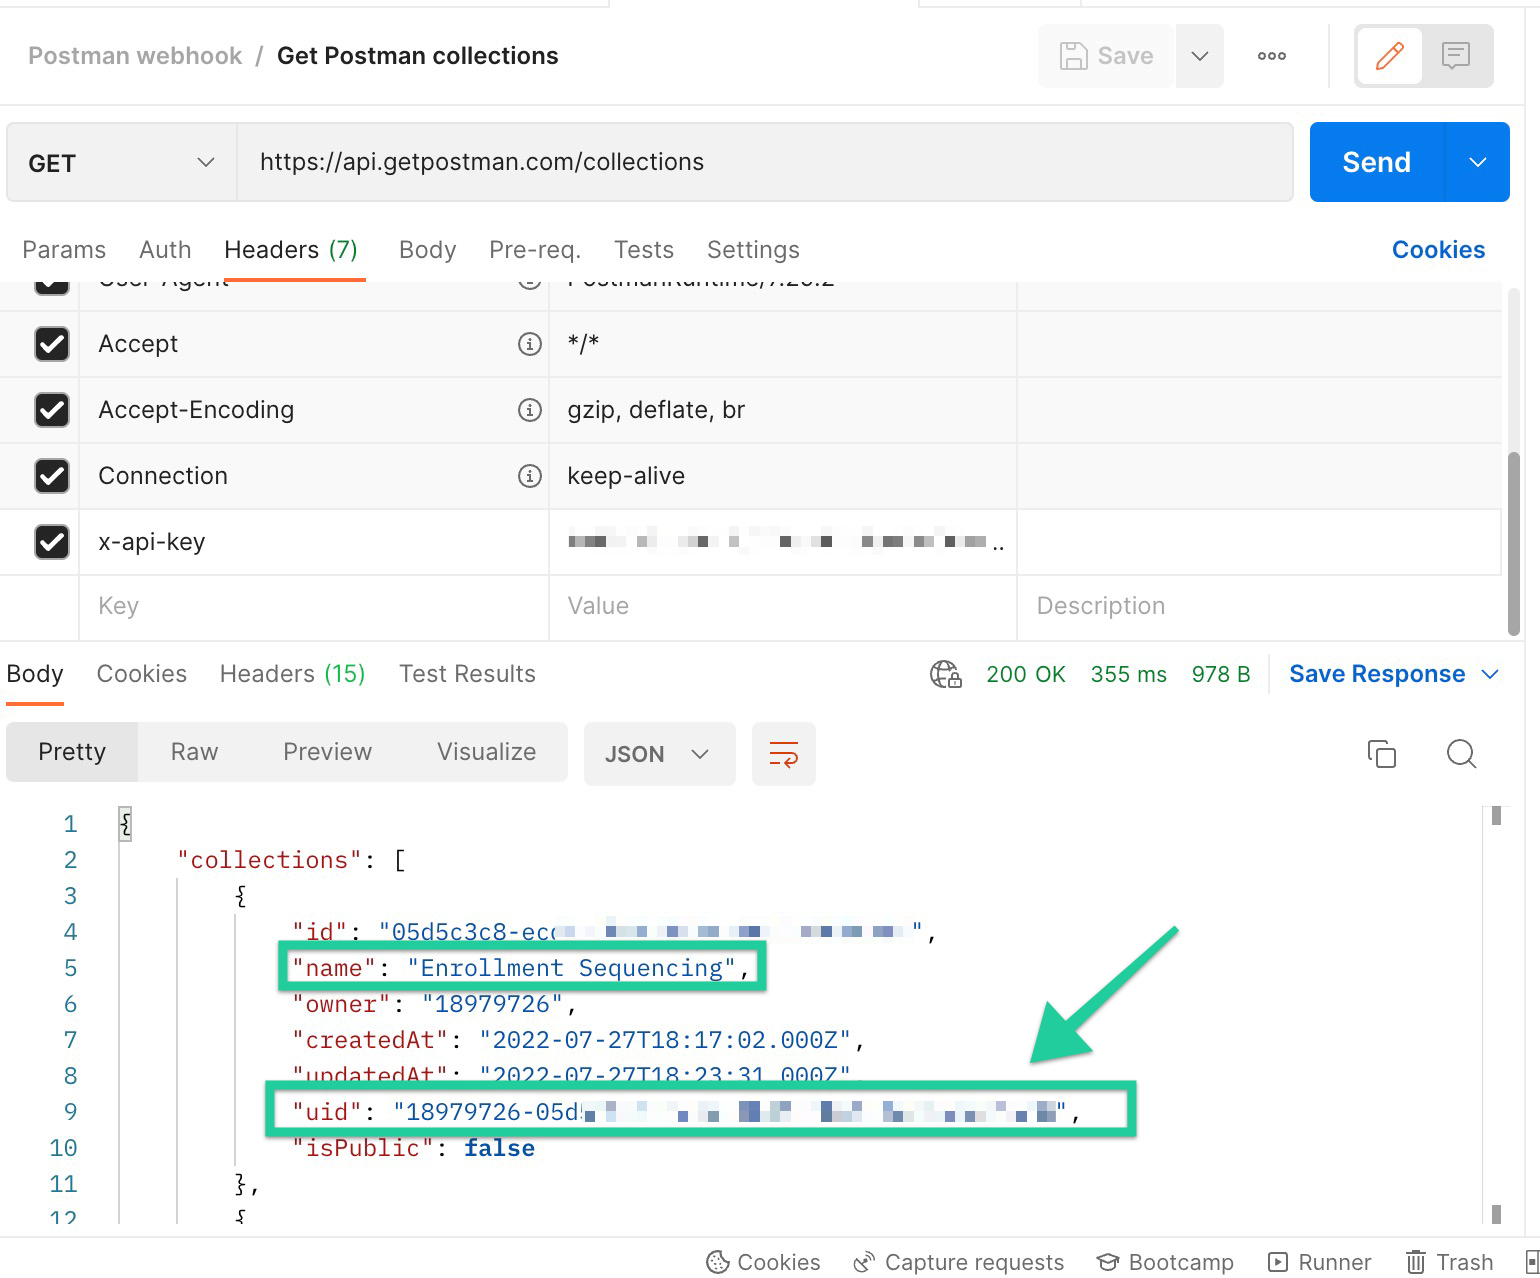
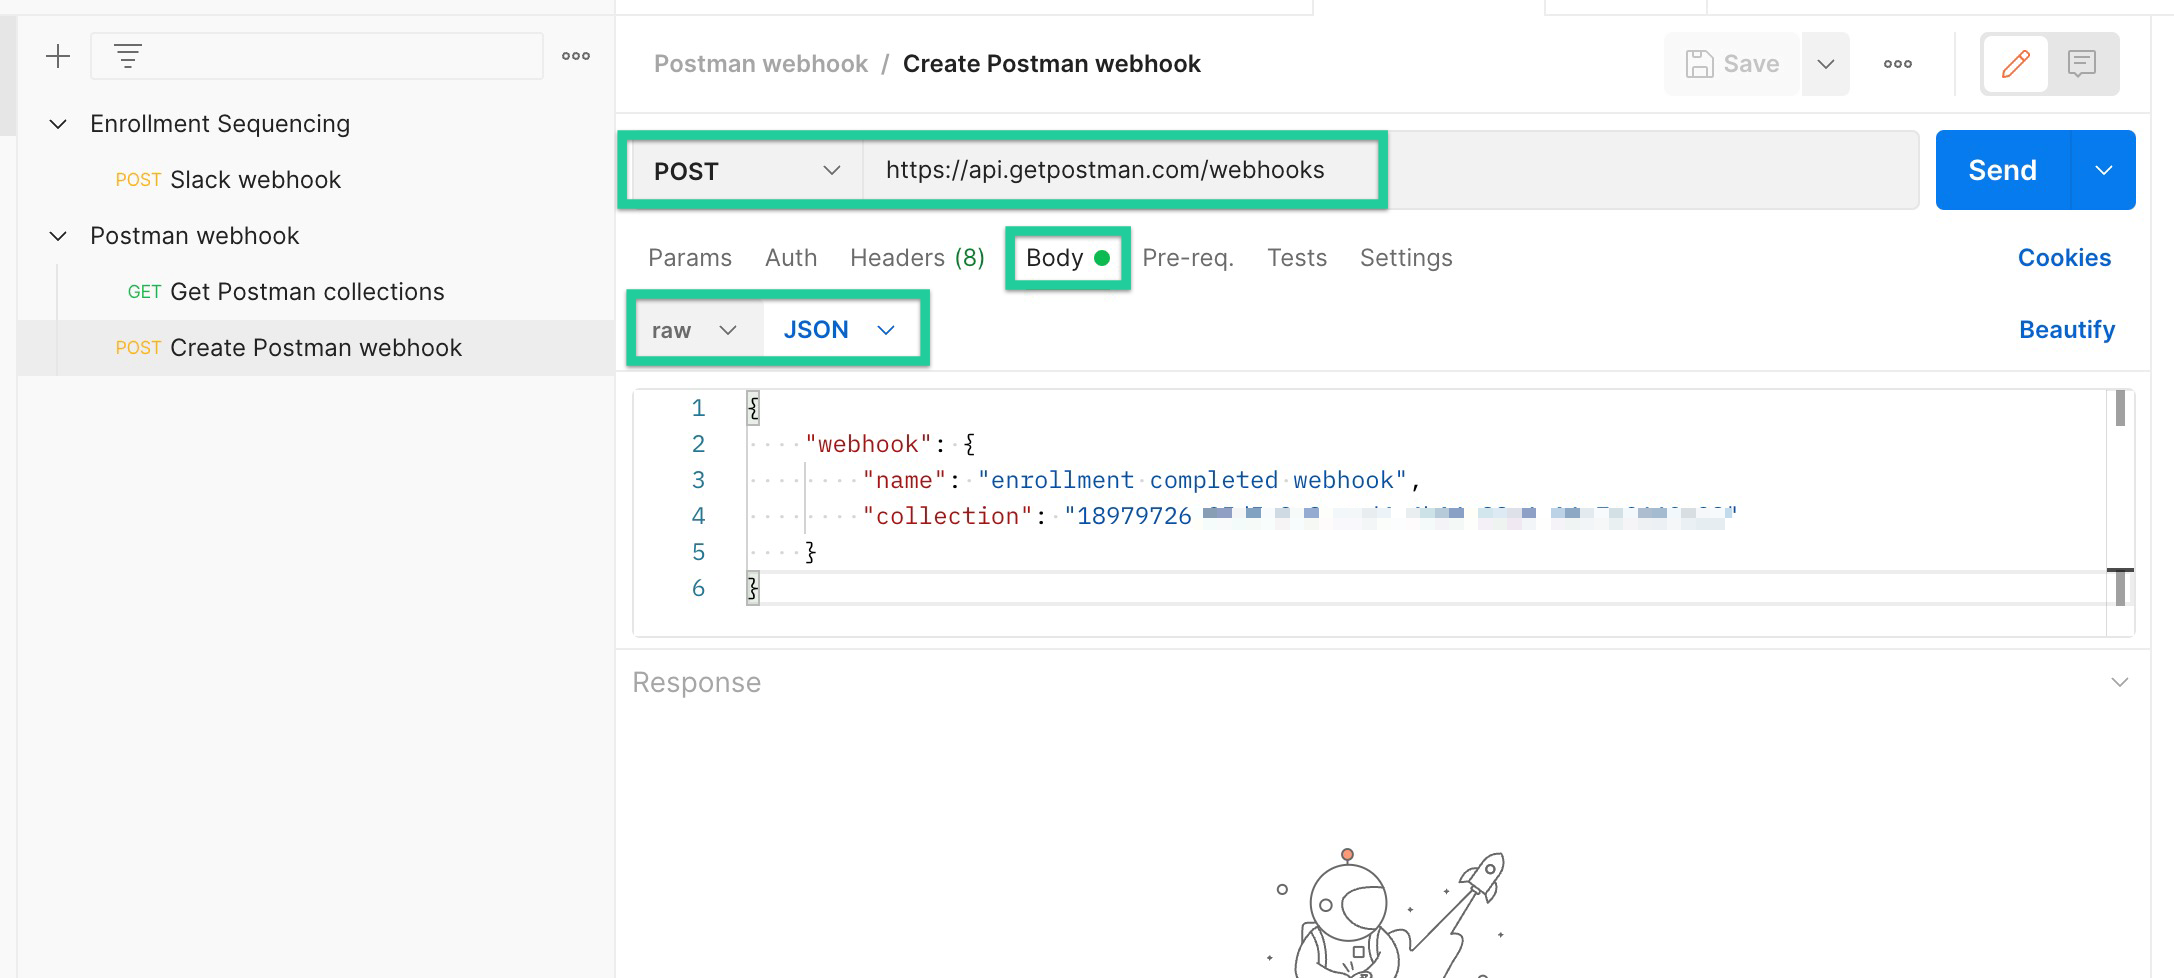
- Now, create another request—this time, we’ll be making a POST request to
https://api.getpostman.com/webhooks. We’ll title this request as “Create Postman Webhook,” and we’ll place it in the “Postman webhook” collection. - In the Body tab of the request, select the raw data type option from the dropdown menu, and then select JSON as the input type. Finally, paste the below JSON data in the body window (You can name the webhook whatever you want, and need to replace the “uid-number-here” value with the UID number copied in step 13 above.)
{
    "webhook": {
        "name": "enrollment completed webhook",
        "collection": "uid-number-here"
    }
}
- Make sure you’ve added your Postman API key as an
x-api-keyvalue in your request header. Then, Save your changes and Send the request. - In the body of the return data, copy the
webhookUrlvalue—this will be needed shortly.
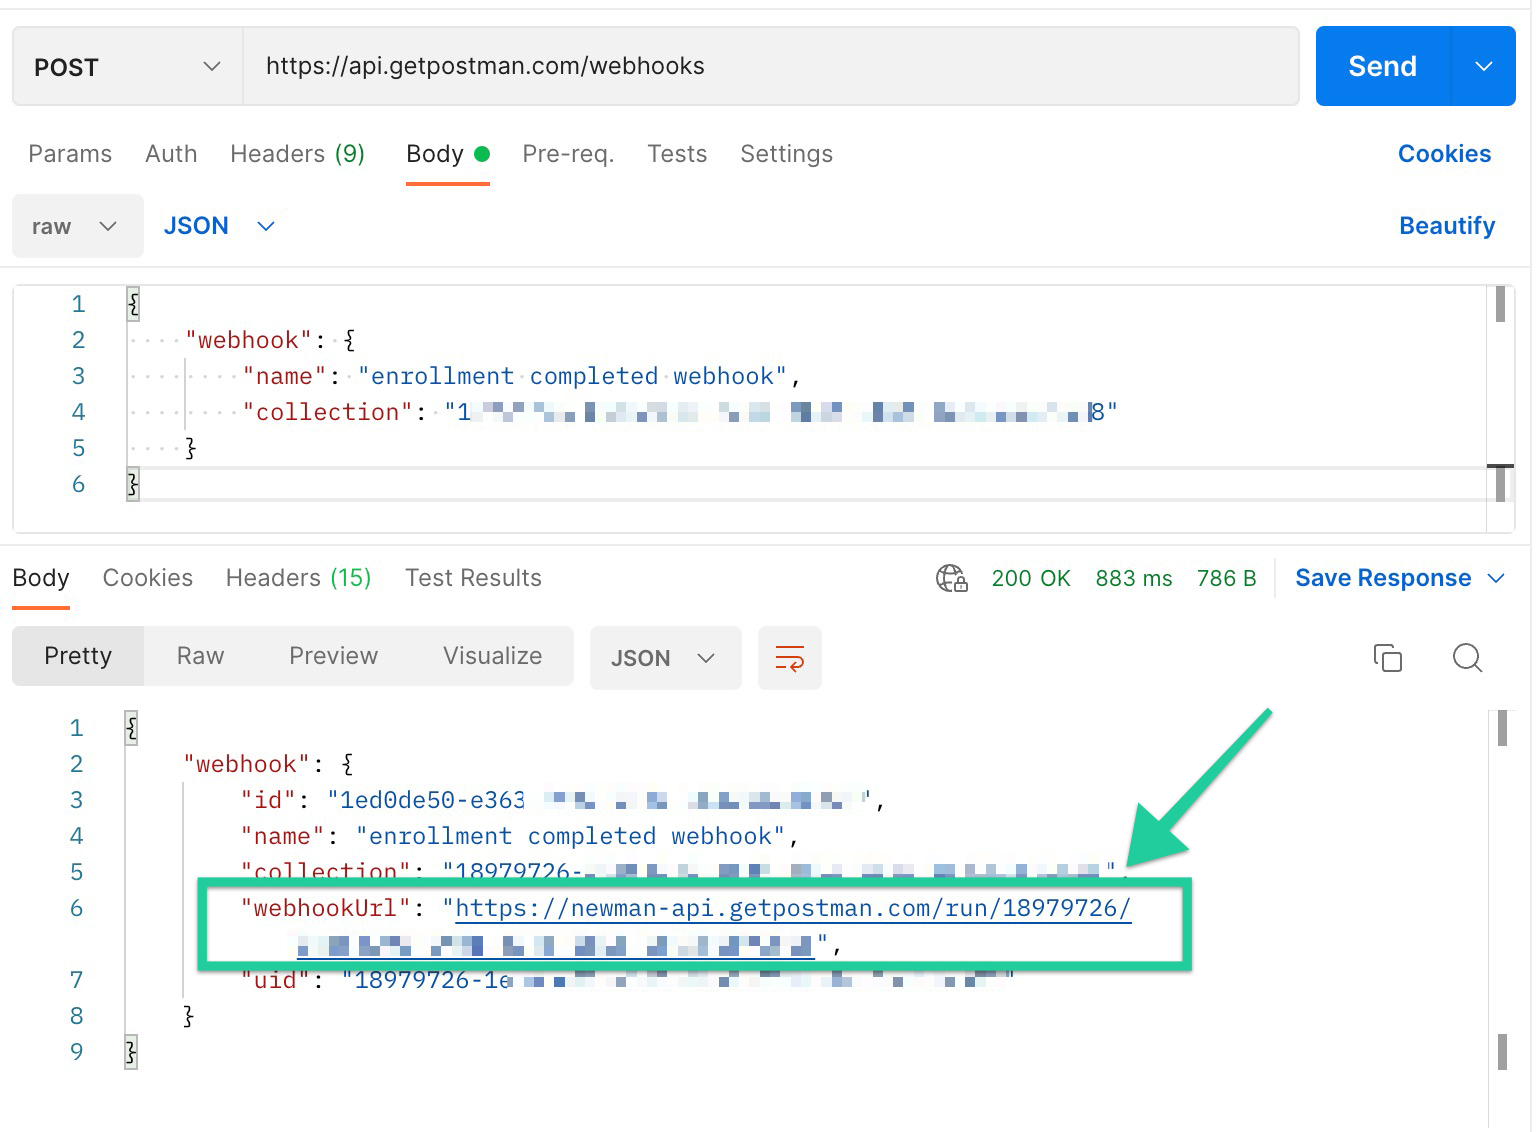
We’re getting there! Next up, we’re going to set up ourEnrollment Completed webhook in Teachable.
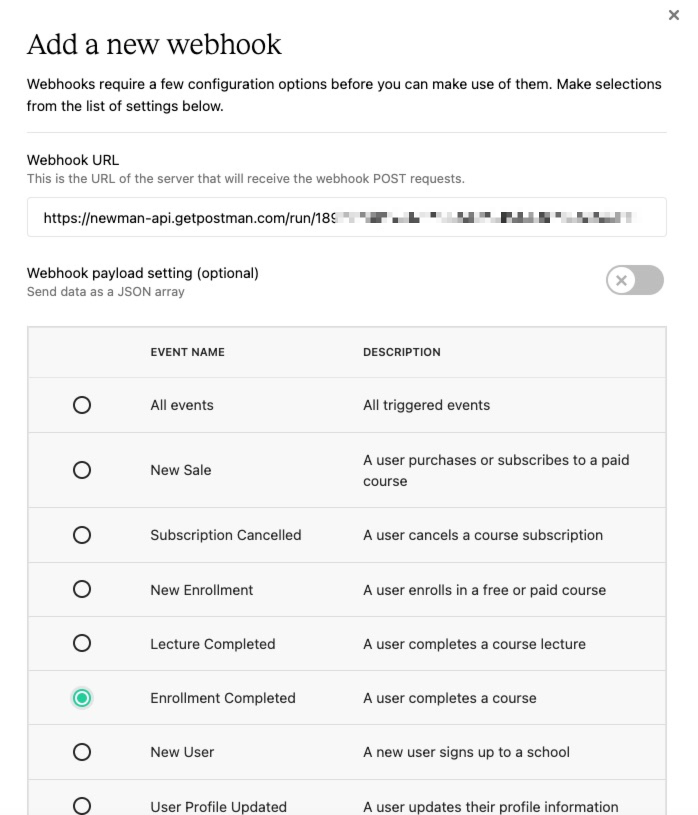
- Log in to your Teachable account, and create a new webhook from your Settings > Webhooks page. (Learn more about creating webhooks in Teachable).
a. The Webhook URL will be thewebhookUrlvalue copied in step 17 of the section above.
b. Keep the webhook payload setting toggle turned off.
c. For the event type, we’ll use Enrollment completed (as we want to get notified when a user is completing a course).
- To test that everything is working as expected, try triggering the webhook in Teachable (you can create a test student account in your course—and once you’ve reached 100% completion, you should see the test “hello, world!” notification come through your Slack workspace.)
At this point, we know that our Teachable webhook and Slack notification are connected—however, we want to be able to parse through the webhook data that is sent to Slack, and pull out specific pieces of data that we need.
- Navigate back to Postman and the POST request to the slack webhook URL.
- In the Pre-request Script tab, add the following piece of Javascript:
var previousRequest = JSON.parse(globals.previousRequest),
    webhookRequestData = previousRequest.data;

let user_id = webhookRequestData.object.user_id
let user_name = webhookRequestData.object.user.name
let course_name = webhookRequestData.object.course.name

pm.variables.set("user_id", user_id)
pm.variables.set("user_name", user_name)
pm.variables.set("course_name", course_name)

console.log(JSON.stringify(webhookRequestData));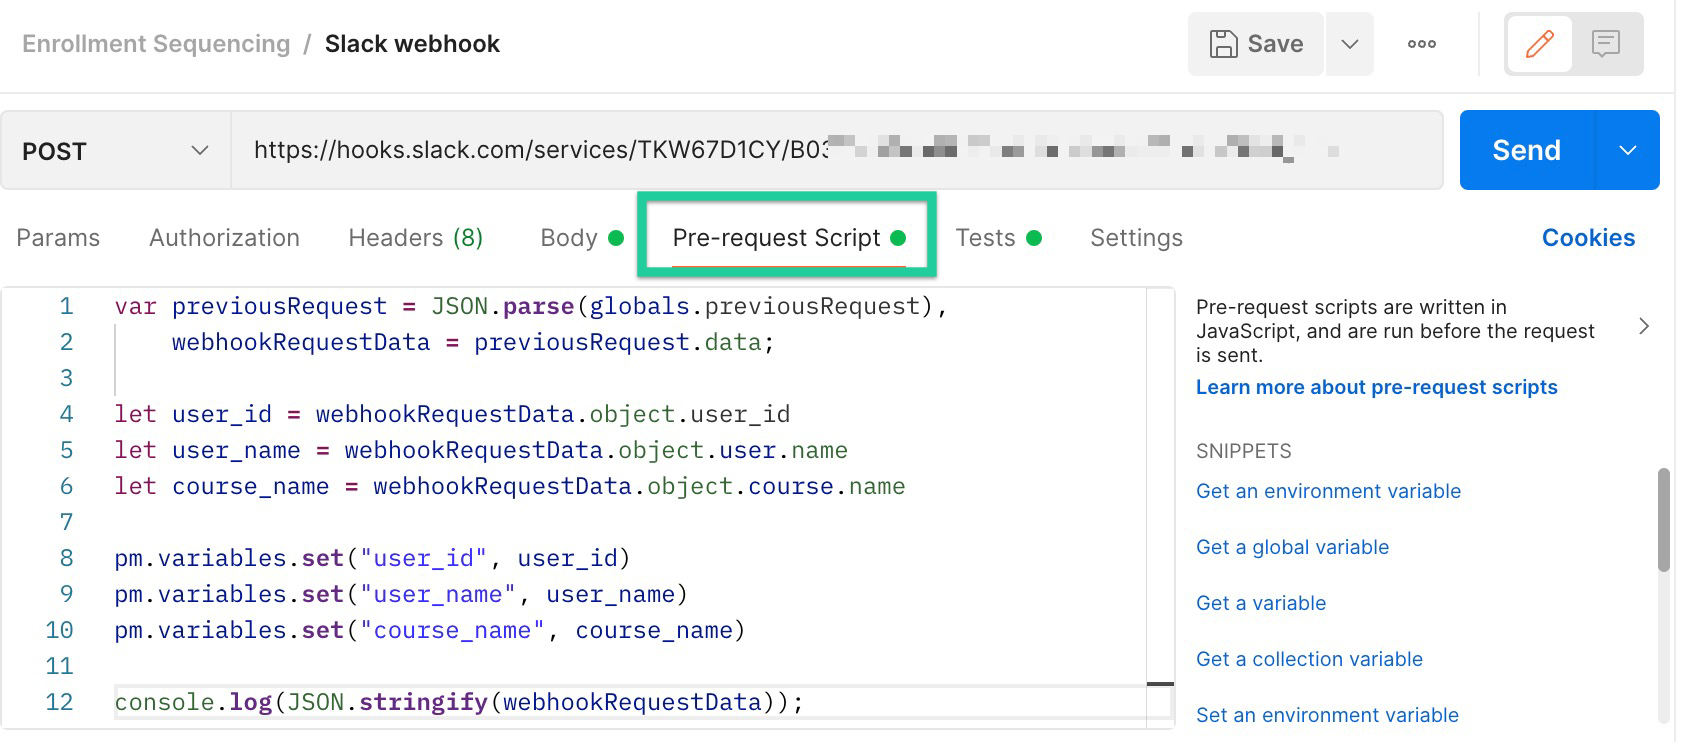
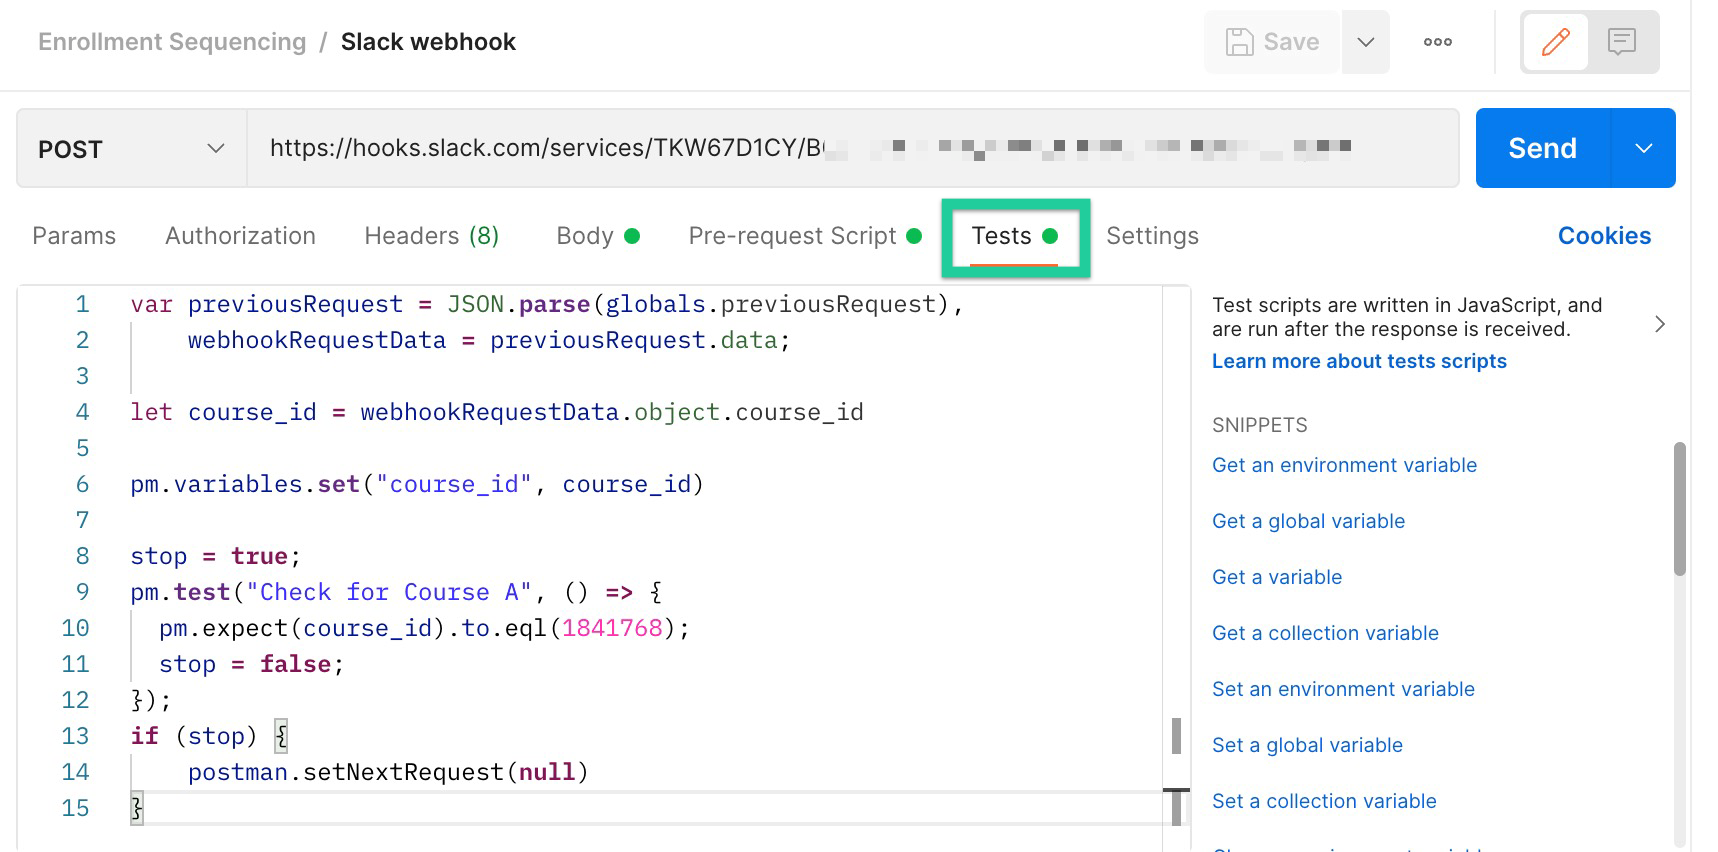
- Next, switch to the Tests tab of the same POST request and add the following Javascript. (You’ll need to replace the
12345value with the Course ID number of Course A, which is the first course you want to be a part of the sequence. This code instructs the sequence to only continue if the course that was completed was Course A. If any other course was completed, the rest of the sequence will intentionally fail.).
var previousRequest = JSON.parse(globals.previousRequest),
    webhookRequestData = previousRequest.data;

let course_id = webhookRequestData.object.course_id

pm.variables.set("course_id", course_id)

stop = true;
pm.test("Check for Course A", () => {
  pm.expect(course_id).to.eql(12345);
  stop = false;
});
if (stop) {
    postman.setNextRequest(null)
}
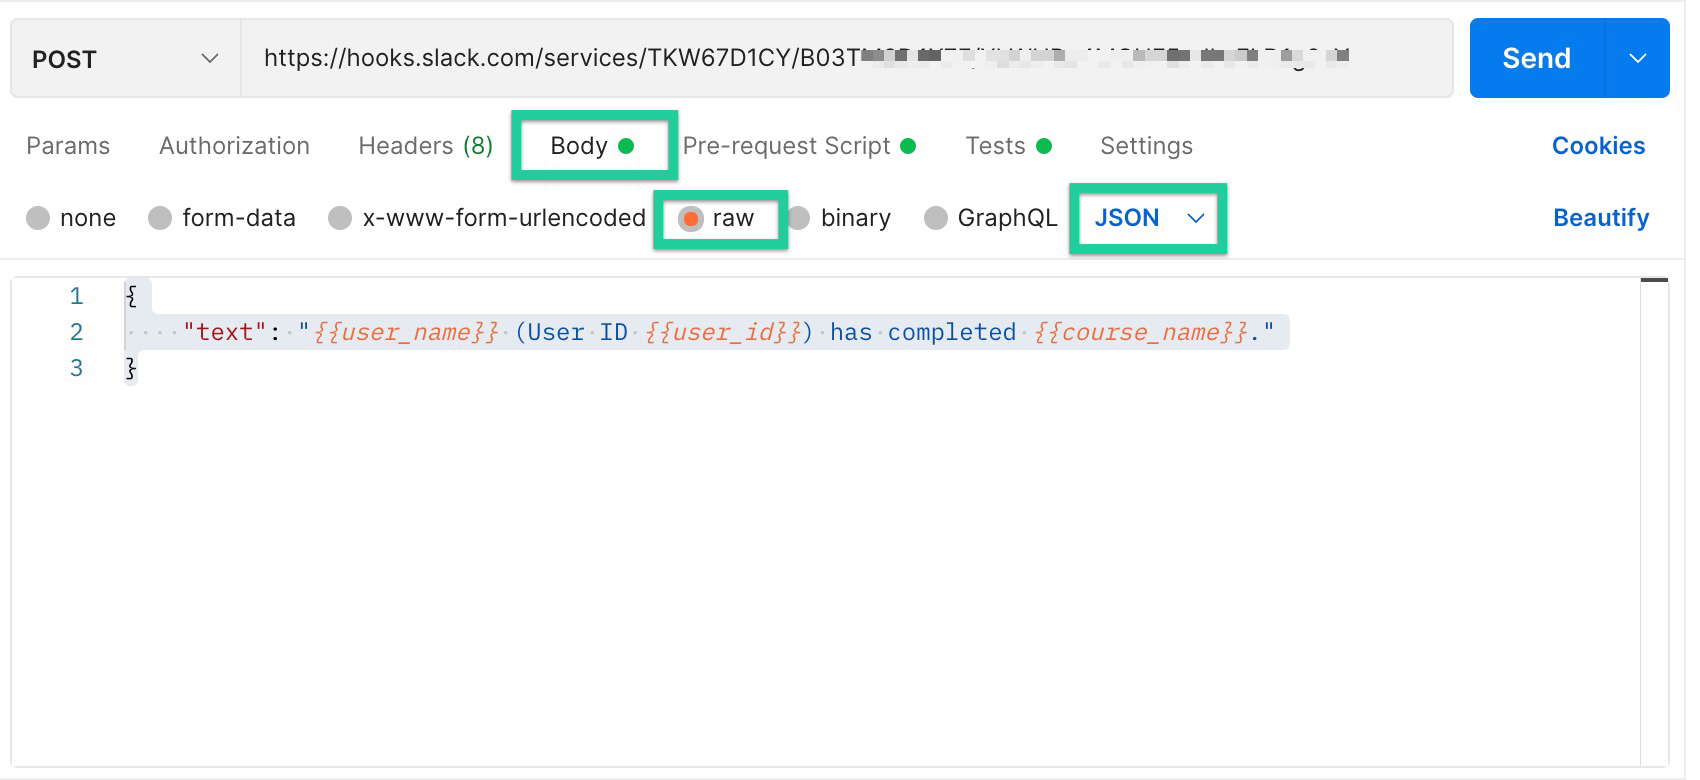
- In the Body tab of the request, add some JSON using the
user_id,user_name, andcourse_namevariables you just set in the pre-request script. You can customize this as you’d like—this will just be the text that displays in your slack channel when a student completes any course in your school.
{
    "text": "{{user_name}} (User ID {{user_id}}) has completed {{course_name}}."
}
- Save your changes. To test if the script works, you can complete a course in your Teachable school with a test student account. Once you complete the course, you should receive a notification in Slack:

As a final step, we need to add a request to the Teachable API that enrolls the student in Course B.
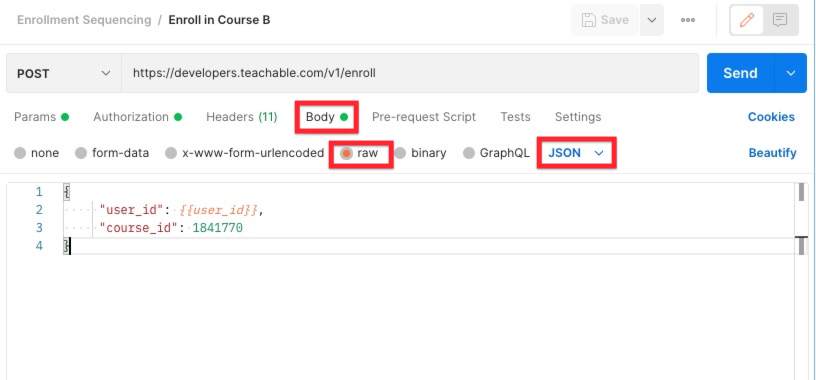
- Back in Postman, add a new request to the Enrollment Sequencing collection. We’ll call this one “Enroll in Course B.” The request is a POST request to
https://developers.teachable.com/v1/enroll. - In the Body tab of the request, select the raw data type option from the dropdown menu, and then select JSON as the input type. Finally, paste the below JSON data in the body window. You'll need to replace
12345with the unique ID number of the course you want to enroll the student in after they complete course A. (i.e., the course ID number for Course B).
{
     "user_id": {{user_id}},
     "course_id": 12345
}
- Make sure to add your Teachable API key to the Header of the request as the value for
apiKey. (Learn more about getting your Teachable API key). - Save your request.
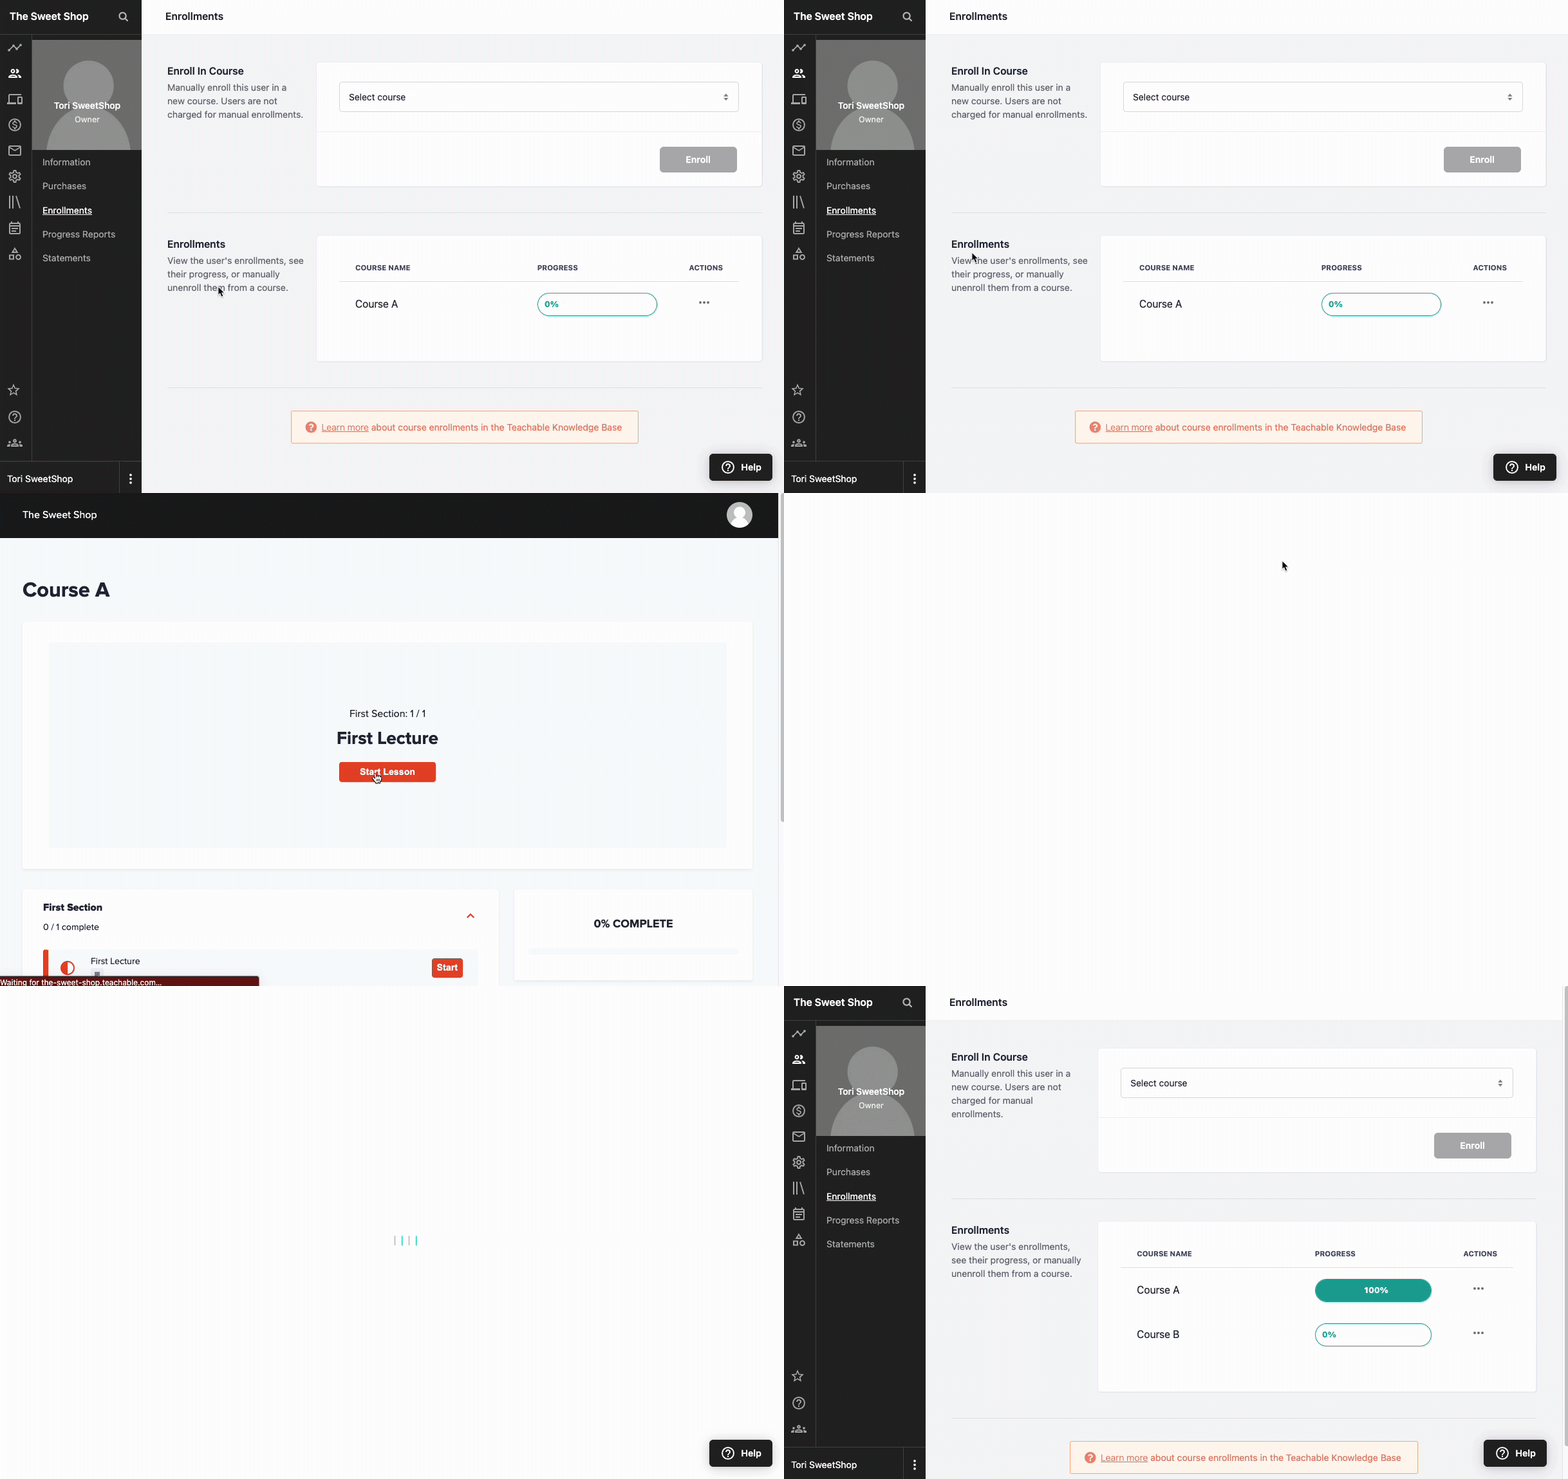
Once you complete the above, your automation is complete. To make sure that everything works as expected, create a test student account in your school—when you complete your enrollment in Course A, you should automatically be enrolled in Course B.
Updated 5 months ago