Add and manage webhooks
Add a webhook
To add a webhook:
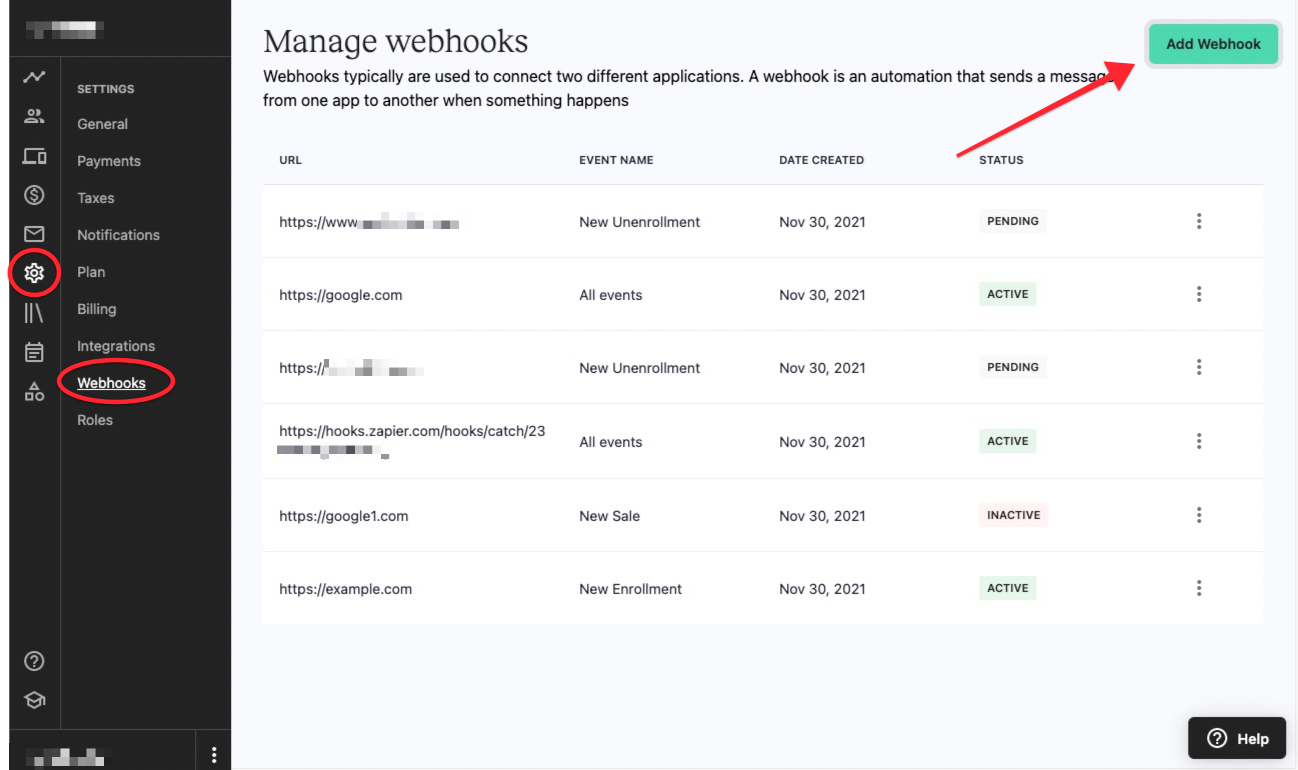
- Select Settings from your school's admin sidebar.
- Click Webhooks.
- Click the Add Webhook button.
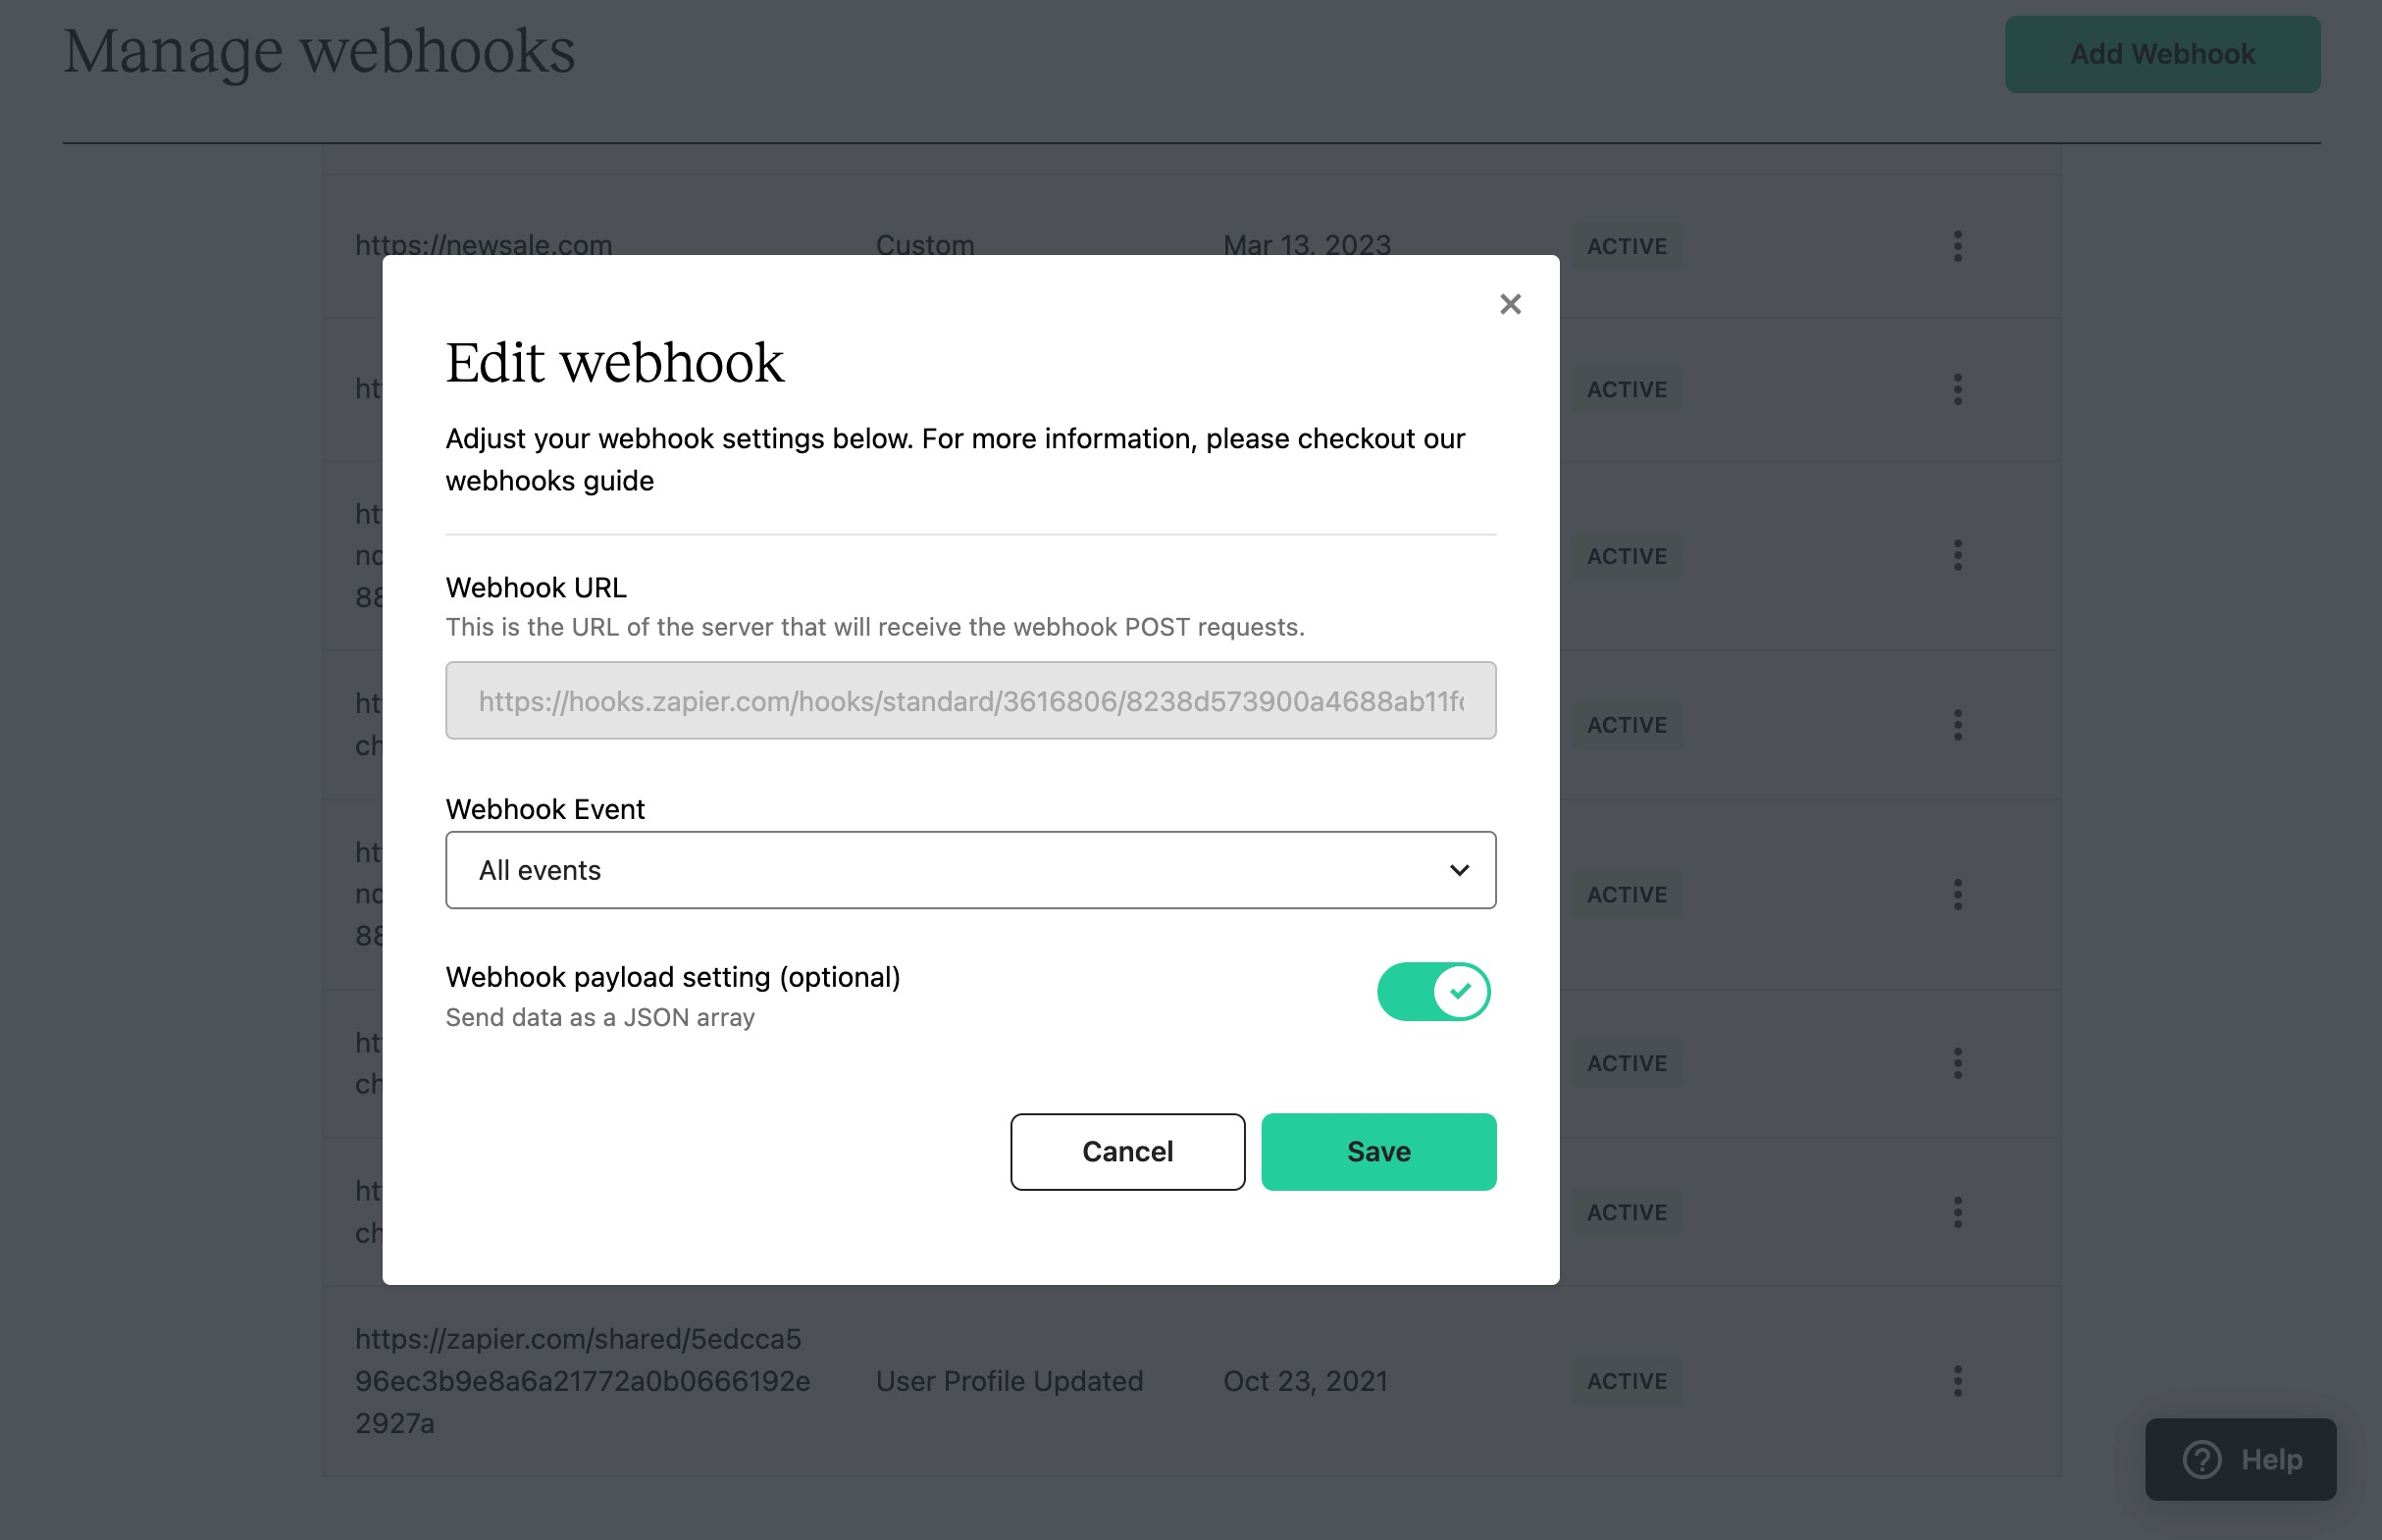
- Enter in the following details:
a. Webhook URL - This is the URL of the server that will receive the webhook POST requests. (You will get this URL from the application you are sending the webhook to. For help with finding this URL, contact the third-party application directly.)
b. Webhook payload setting (optional) - Toggle this setting on to send the webhook data as a JSON array. (Some third-party applications prefer or require data to be sent as a JSON array. If you are unsure, contact the third-party application directly.)
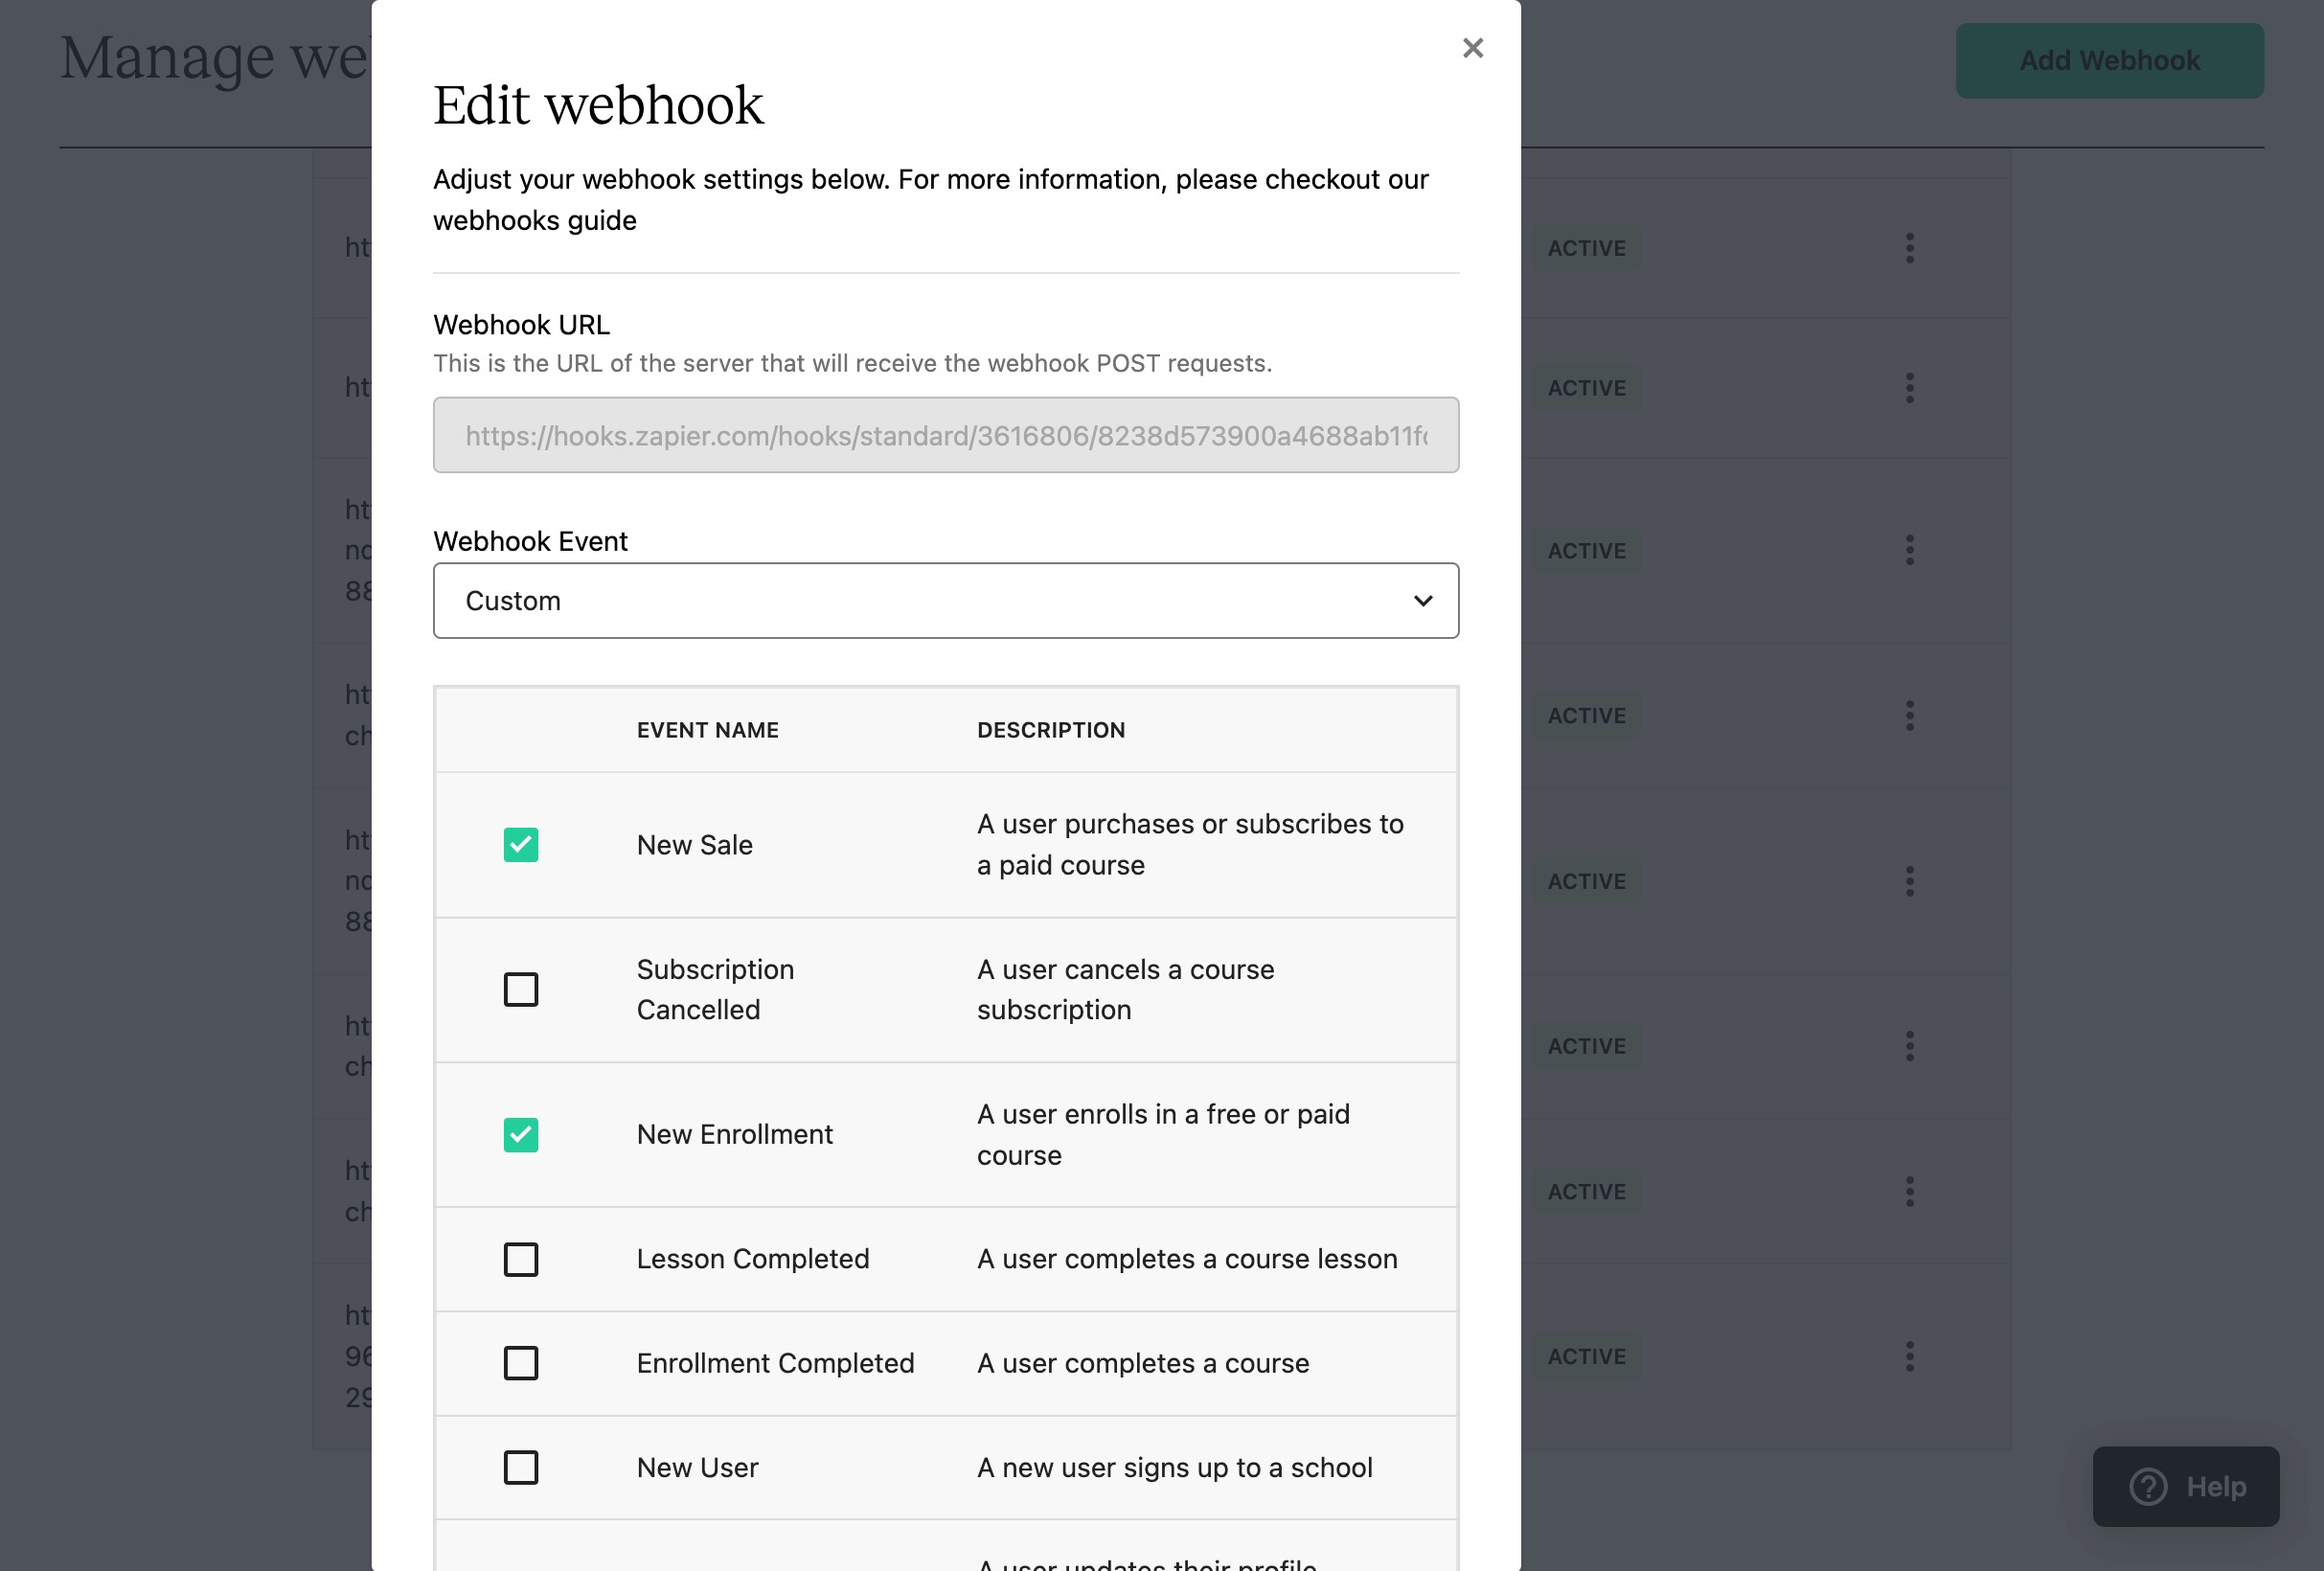
c. Select webhook events - Select the webhook event(s) you want to send to your application. If you would like to send data for all of the available webhooks, select All events. If you would like to send a specific single or combination of events, select Custom - Click Save.
Once you add a webhook, it will be listed in your main Settings > Webhooks menu.
Duplicate webhooks cannot be created.Webhooks with the same url can be created, however, they cannot subscribe to the same webhook events.
Webhook status and history
All webhooks listed in your Settings > Webhooks page will have a status. Statuses are as follows:
- Pending - Once a webhook is created, it automatically has a “pending” status. The webhook will remain pending until the selected event type occurs and the webhook successfully sends.
- Active - A webhook is “active” after it is created and the selected event type successfully fires.
- Inactive - A webhook is inactive if it has failed or been canceled.
To see additional information on each webhook, you can view your webhook history details. (Only active or failed webhooks have a webhook history.)
To access your webhook history:
- Click the More options icon next to the webhook.
- Select View webhook history.
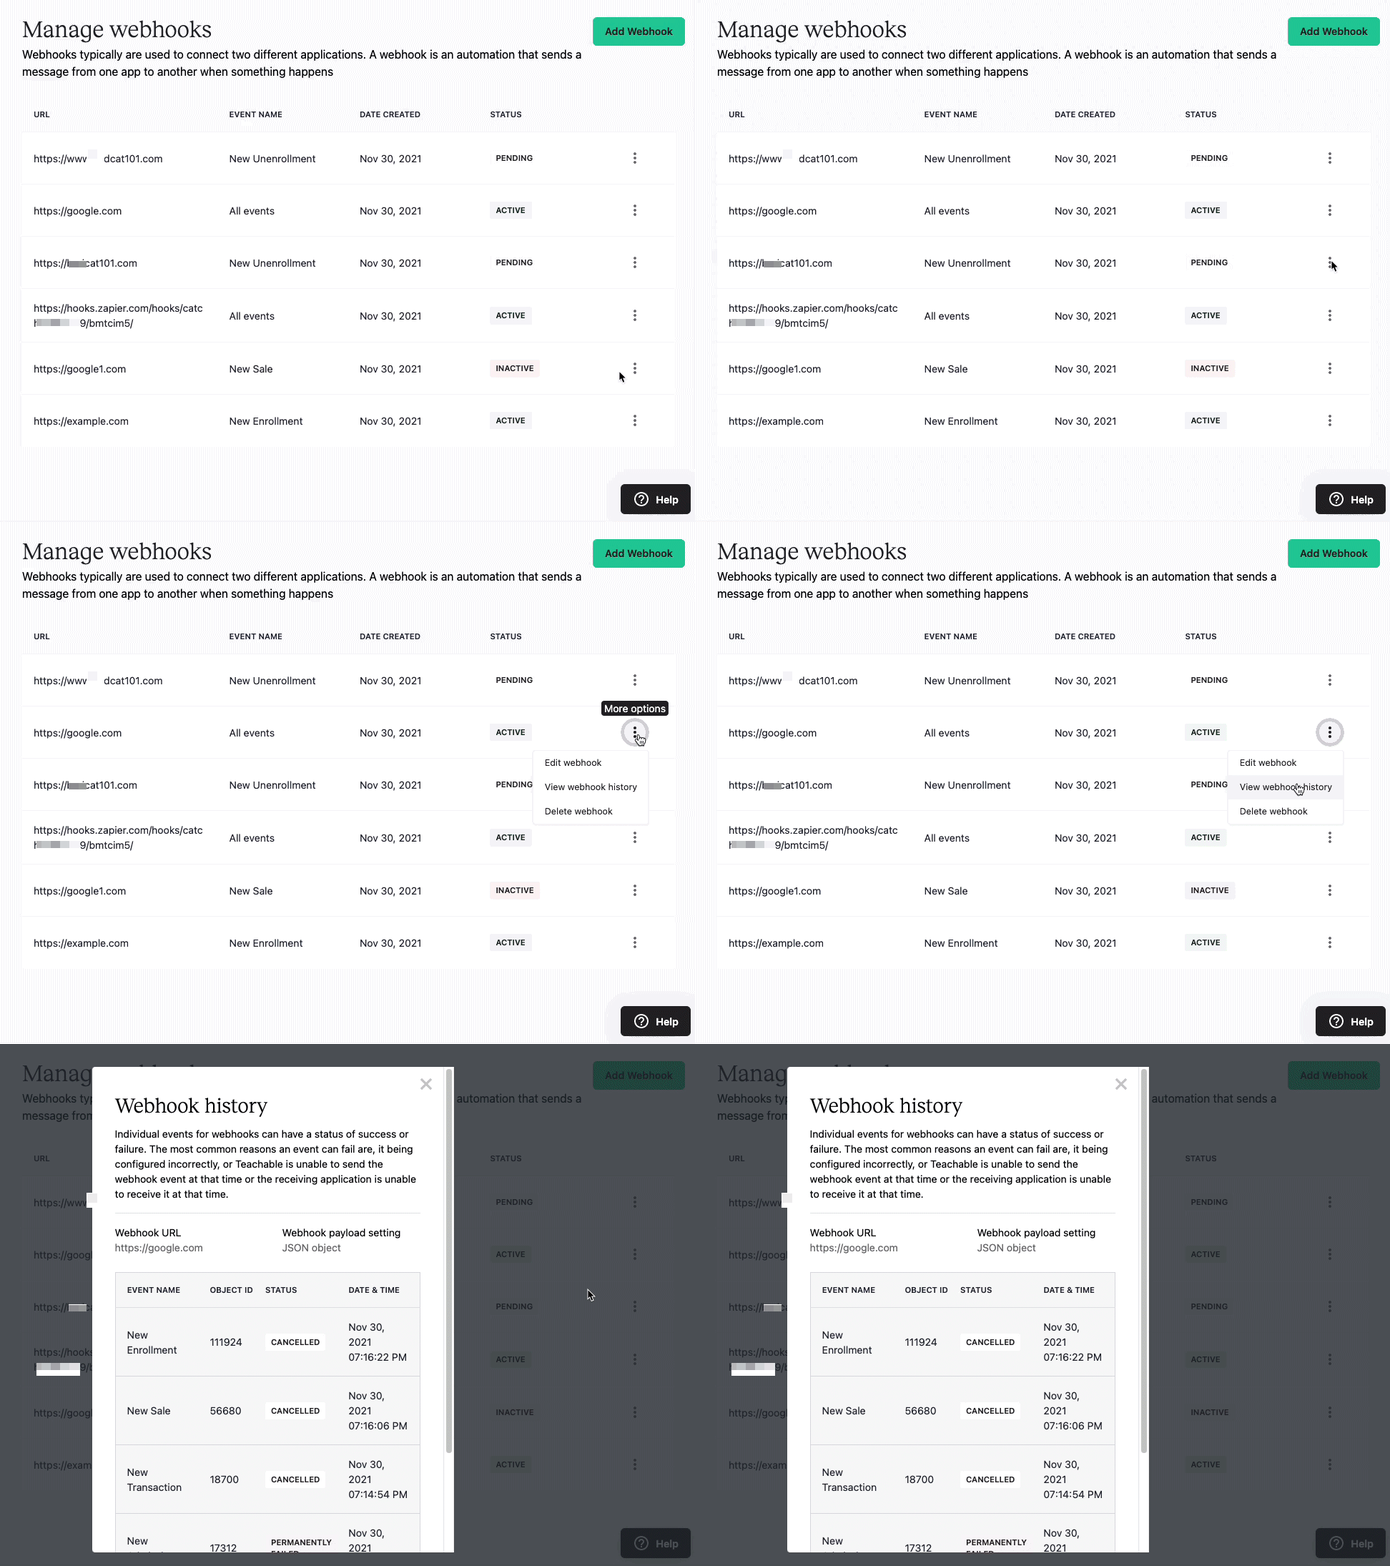
The webhook history table lists the status of each individual event, or firing, of that specific webhook. For example, if you created a webhook for the Enrollment.created event, the webhook history table will add a new row each time the webhook fires (i.e., each time a new student enrolls in your course).
The webhook history table includes the following columns:
- Event name - The webook’s event type.
- Object ID - Each webhook event has a specific ID that will be listed here.
- Status
a. Success - The webhook event fired successfully and data was sent from Teachable to the receiving application.
b. Failed - A webhook event can fail if the webhook is configured incorrectly, Teachable is unable to send the webhook at the time of firing, or the receiving application is unable to receive the webhook at the time of firing.
c. Permanently Failed - After a webhook fails four times, the next event will be permanently failed. If this happens, you can manually re-enable it from the webhook history popup window or from the Edit Webhook page.
d. Canceled - After a webhook permanently fails, the following events of that webhook will be canceled. A webhook can also be canceled if the webhook is deleted during the process of the event being fired. - Date & Time - The date and time that the event fired (in UTC).
Edit webhooks
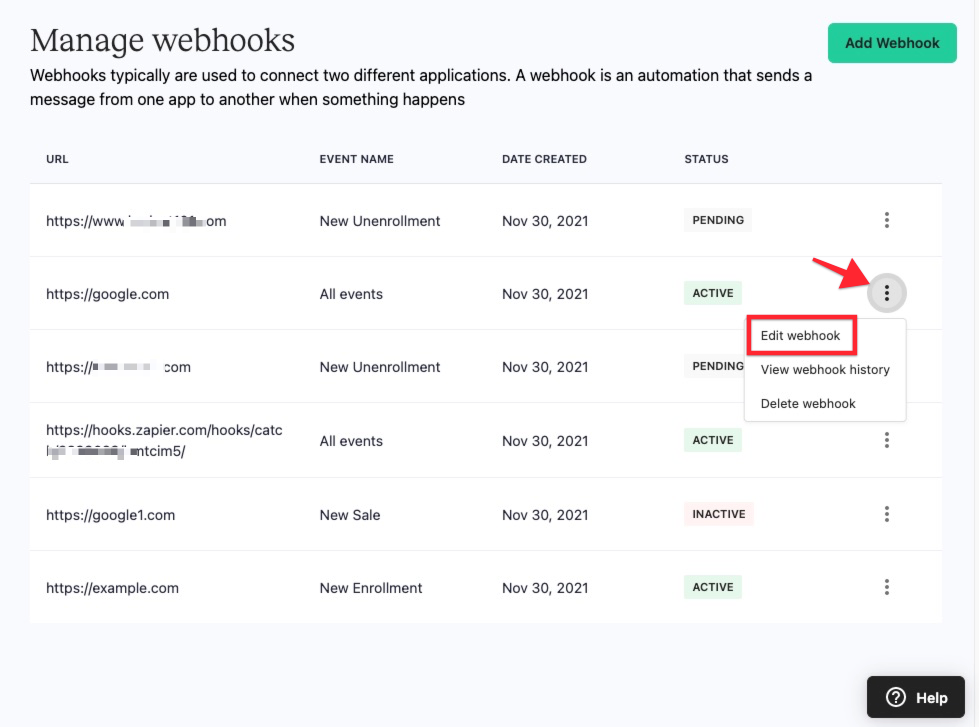
To edit a webhook:
- Click the More options icon next to the webhook.
- Select Edit webhook.
From there, you can edit the payload setting and the event type. If a webhook is inactive because it has permanently failed, you will see an option to Re-enable the webhook.
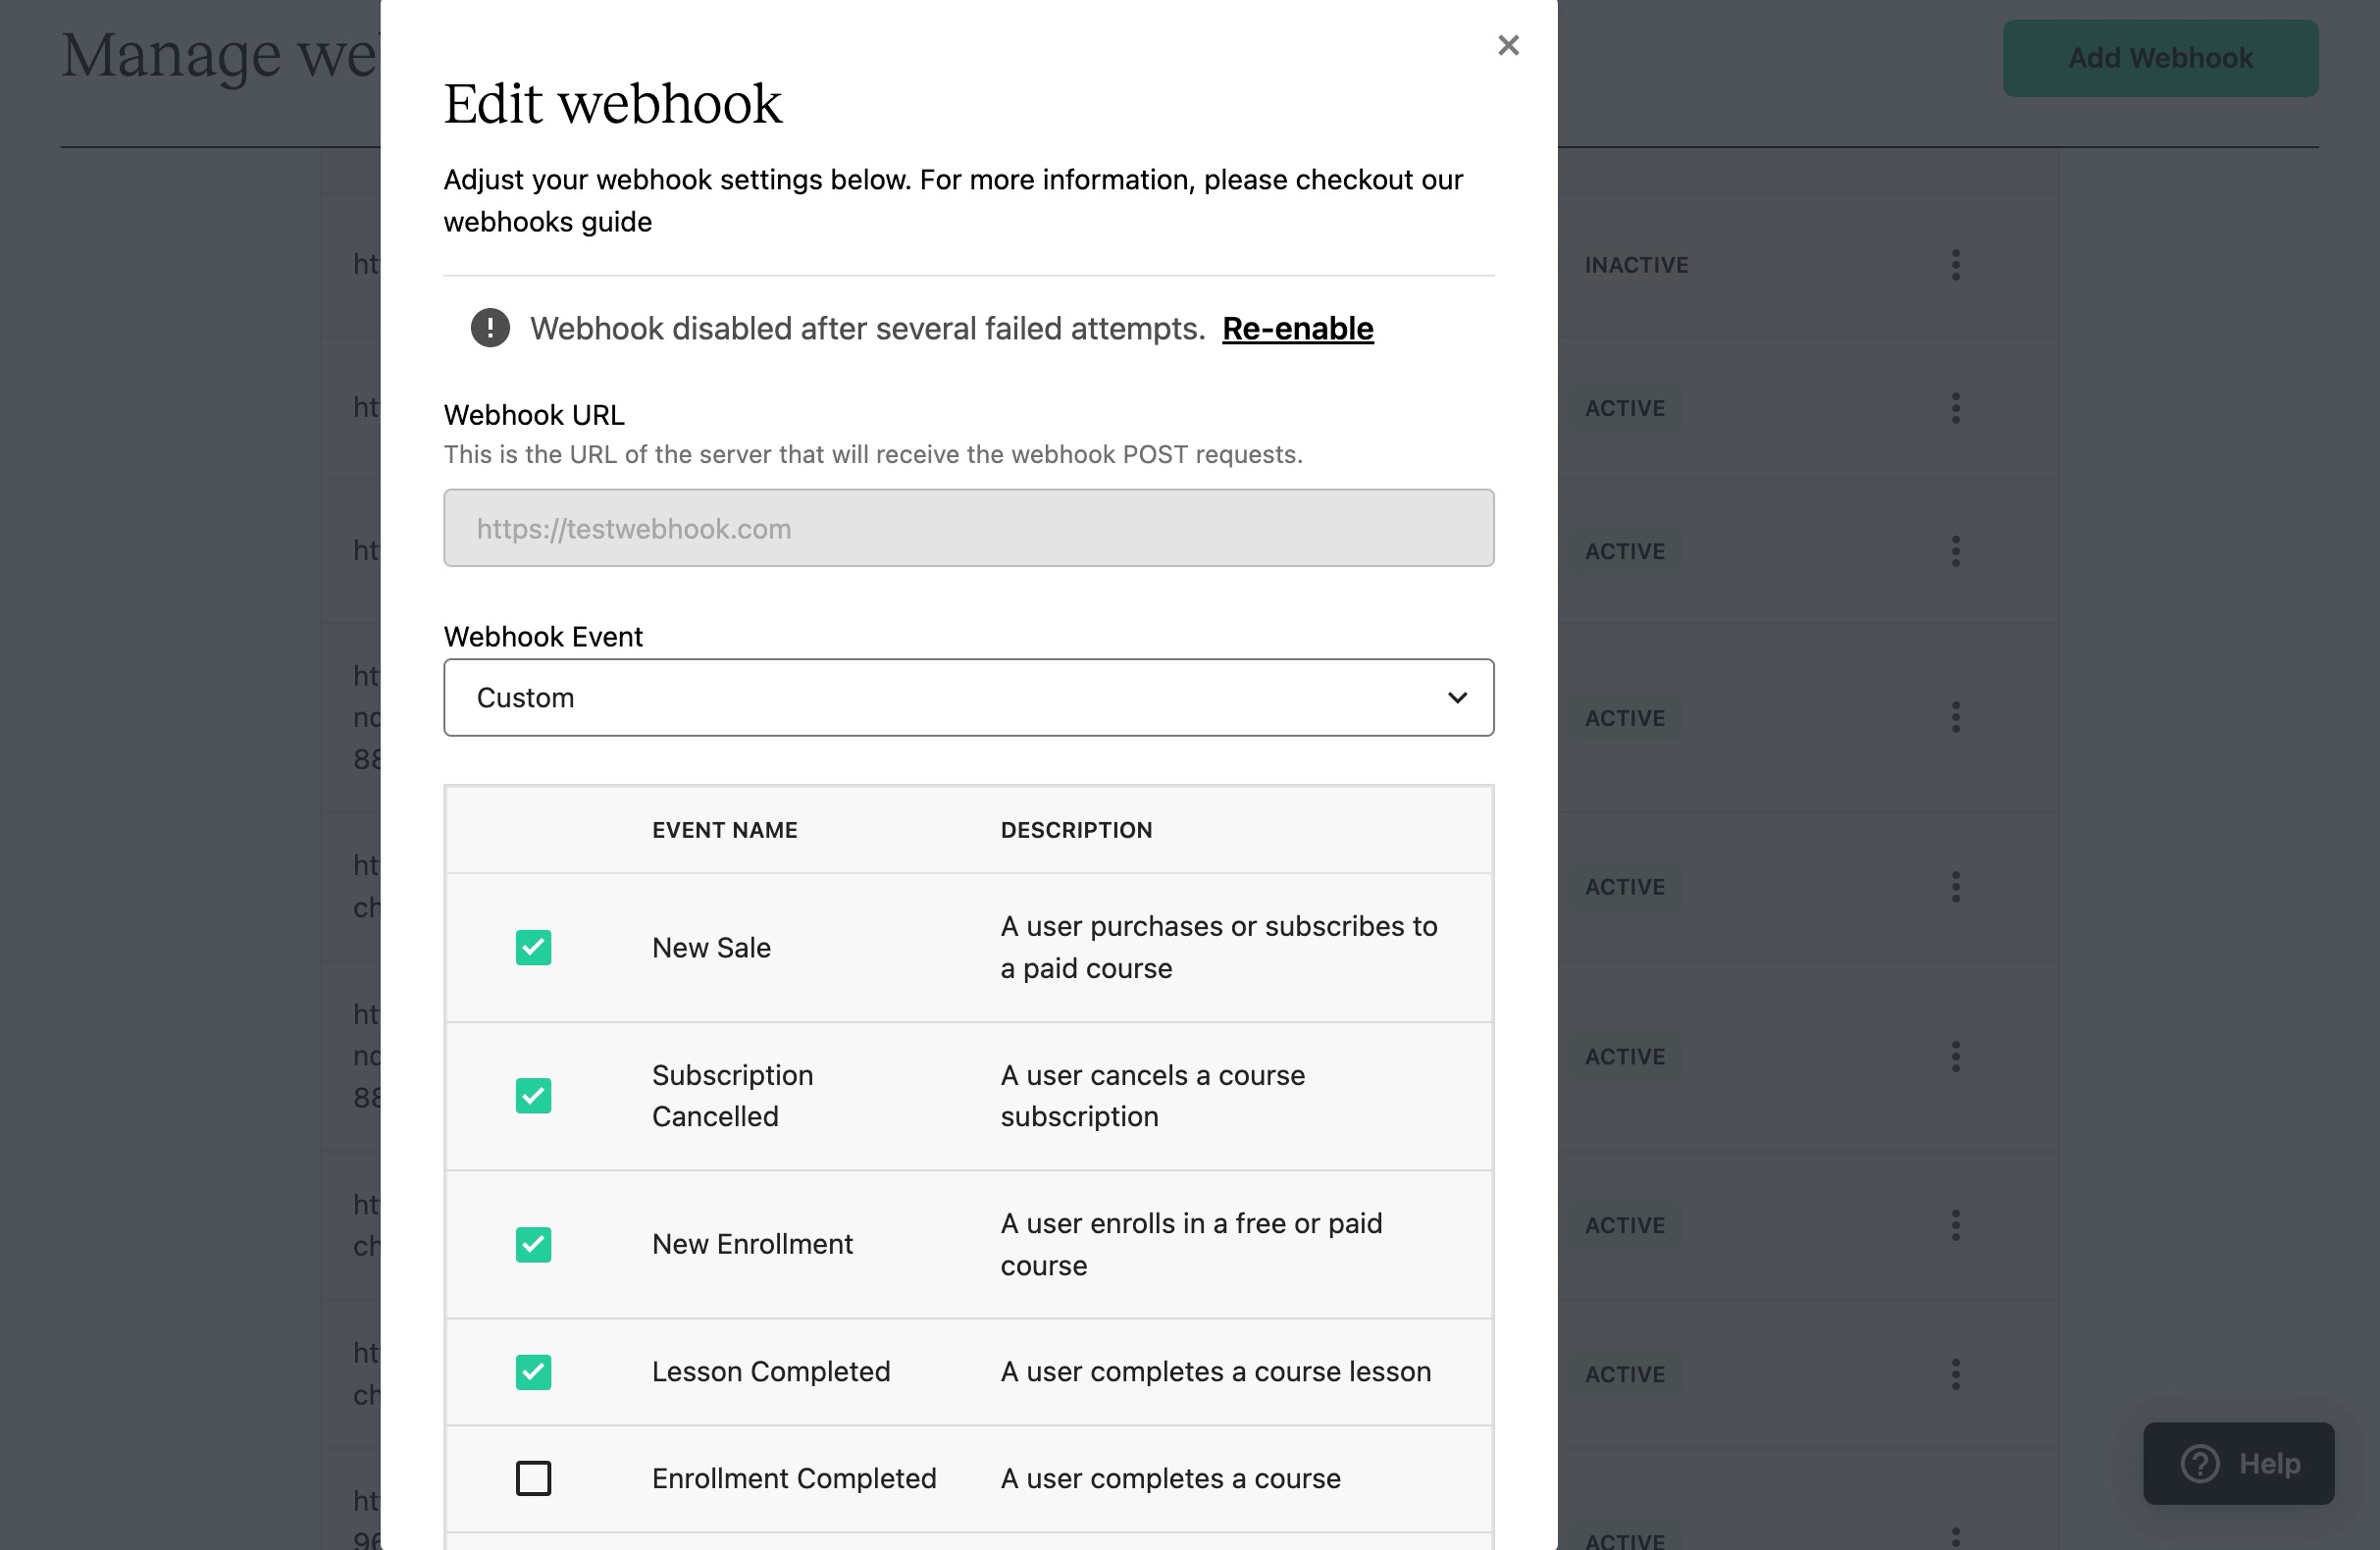
Once you re-enable the webhook, its status will move to Pending until it fires again.
Delete webhooks
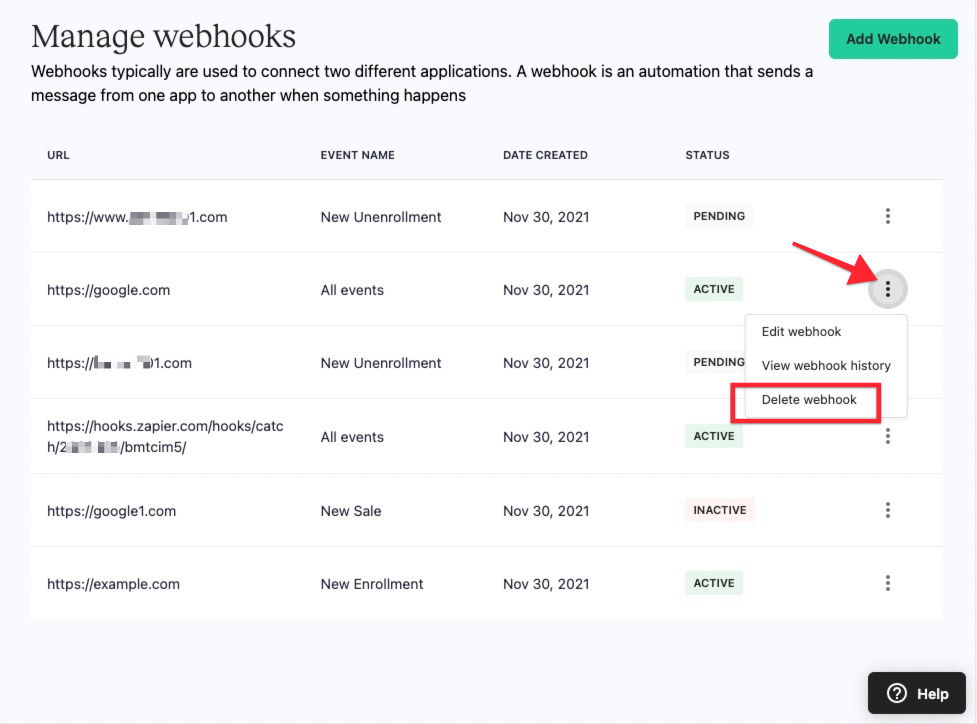
To delete a webhook:
- Click the More options icon next to the webhook.
- Select Delete webhook.
- In the popup confirmation window, click Delete.
Updated 5 months ago